Get your free CO2 calculator
Grow the best plants with your FREE CO2 calculator.

The best sensor is worthless if sensor placement is wrong.
This expert Grow Sensor positioning guide, refined through years of practical experience, is the definitive resource for maximum data accuracy.
We expose the three major flaws in old methods and reveal the scientific "Golden Rule" for Leaf VPD.
Discover how our grow room sensor hanging system, engineered from over 15 prototypes, is the only solution to ensure accurate readings throughout all growth stages.

Accurate sensor positioning is a big challenge in indoor cultivation.
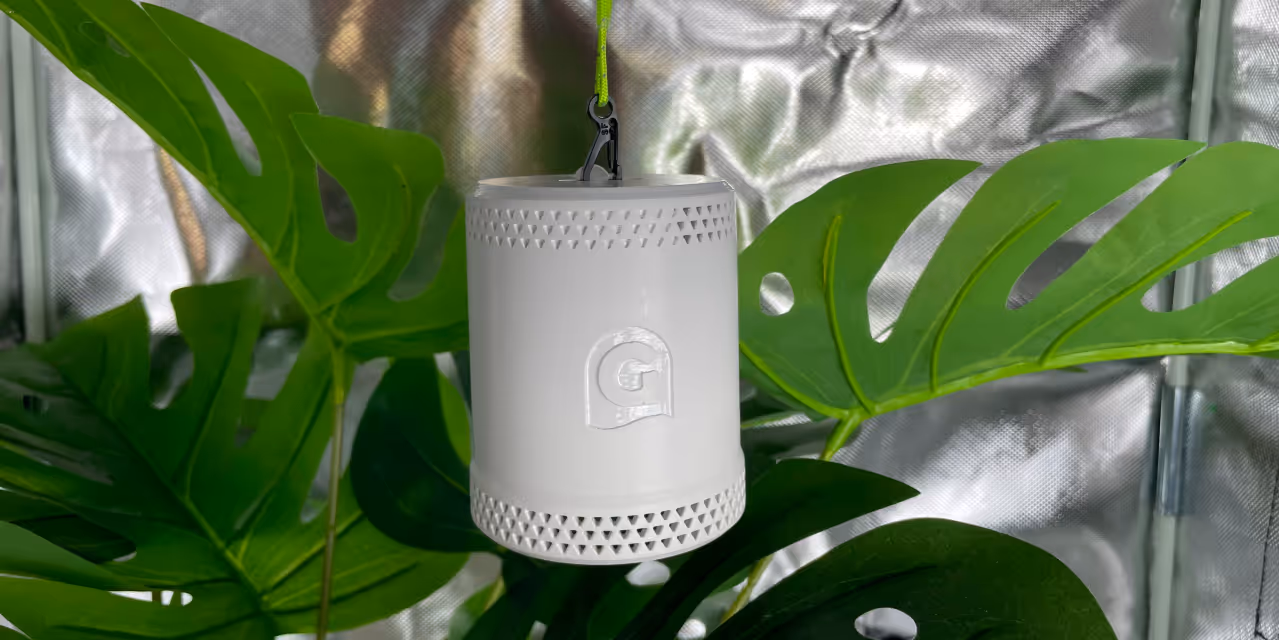
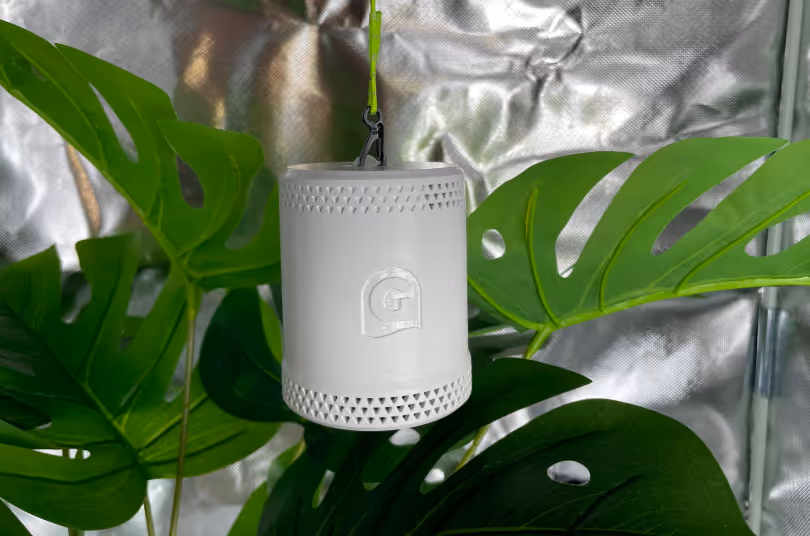
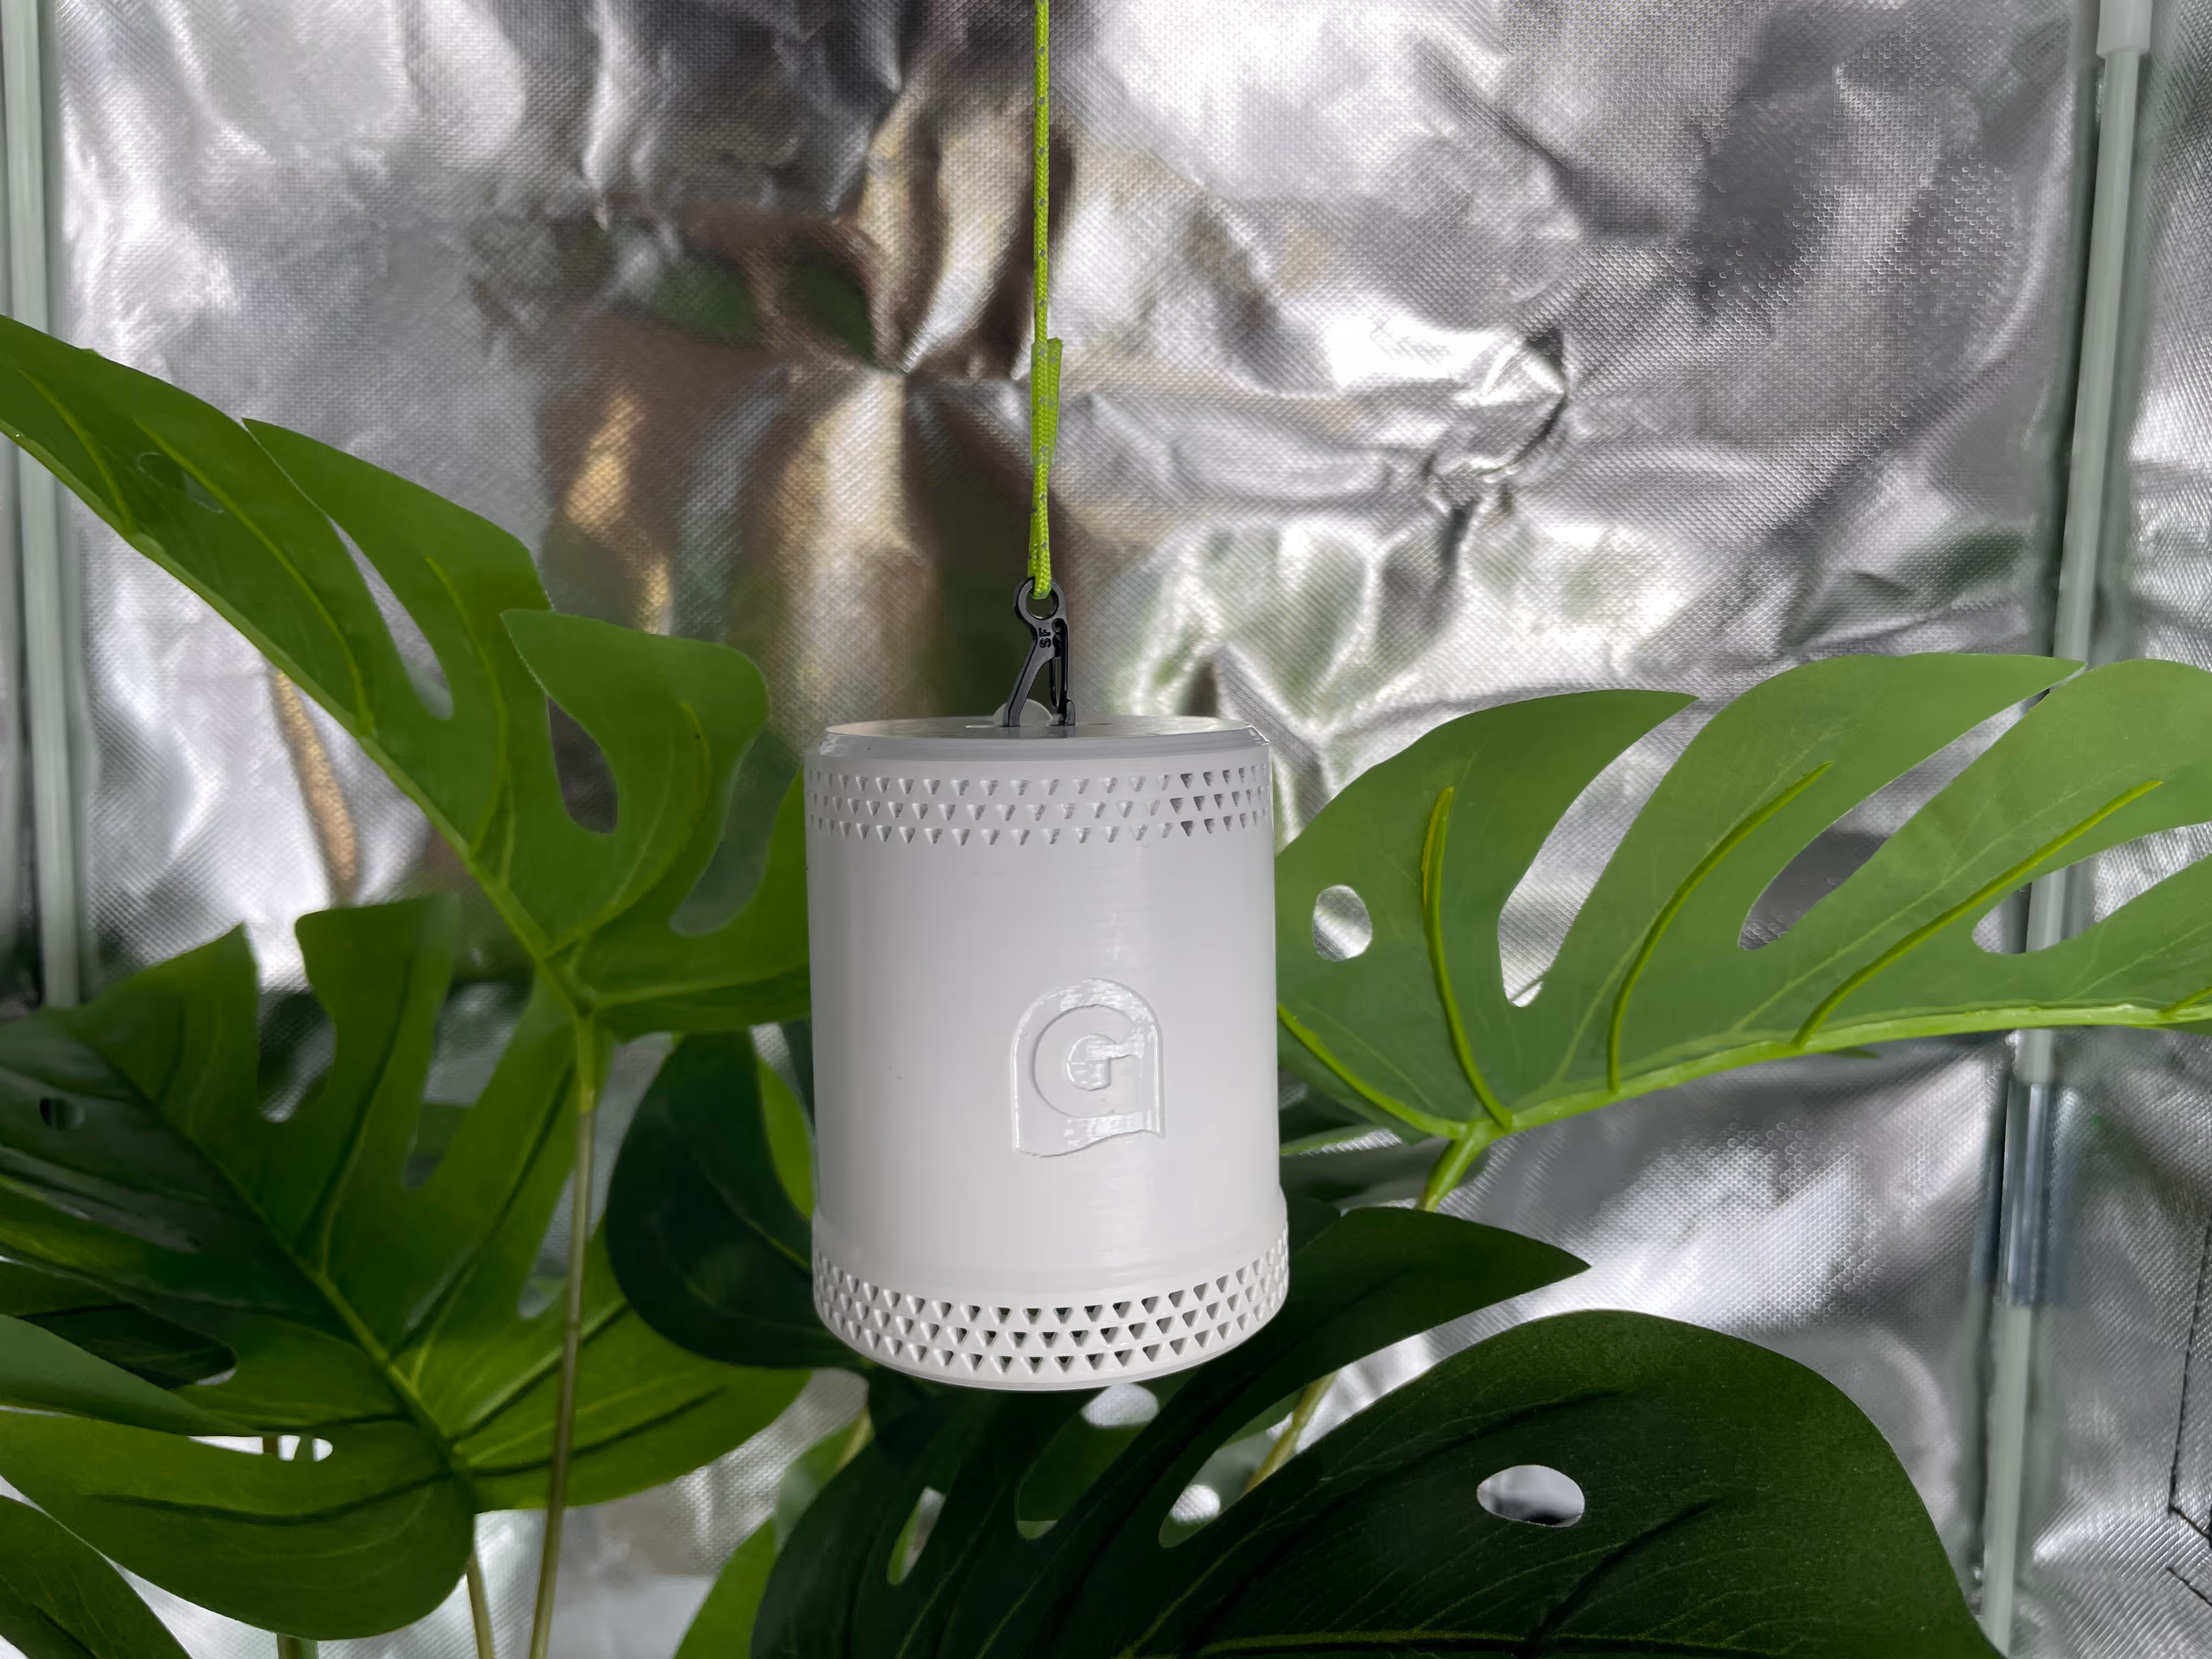
From the start, we designed the Grow Sensor to solve this - making sure it hangs straight, stays secure, and measures exactly where it should.
Generic solutions fail because they introduce three major flaws that directly impact accurate readings:
Let's be honest: The hassle factor is the number one killer of good data.
You know the drill - it's fiddly knots or needlessly cumbersome adjustments.
This often means that changing the position of a sensor is a tedious manual process that gets avoided.
Growers hang the sensor once and then neglect it, resulting in a tool that is quickly left behind as plants mature.
“During one of our trial runs, we left a sensor 10cm too low during late flowering. The readings looked safe - but the top colas were quietly overheating. By harvest, terpene levels were down by almost 15%. It was the clearest proof we’ve ever had that small placement errors cause big losses.” - Theo Gardner
Continuous adjustment is non-negotiable for highly accurate data.

As plants rapidly increase in height, particularly during the flowering stage, a static sensor can be left too low.
Neglect in the final weeks of the grow cycle can lead to significant stress and reduced quality in your final results, often manifesting as terpene loss.
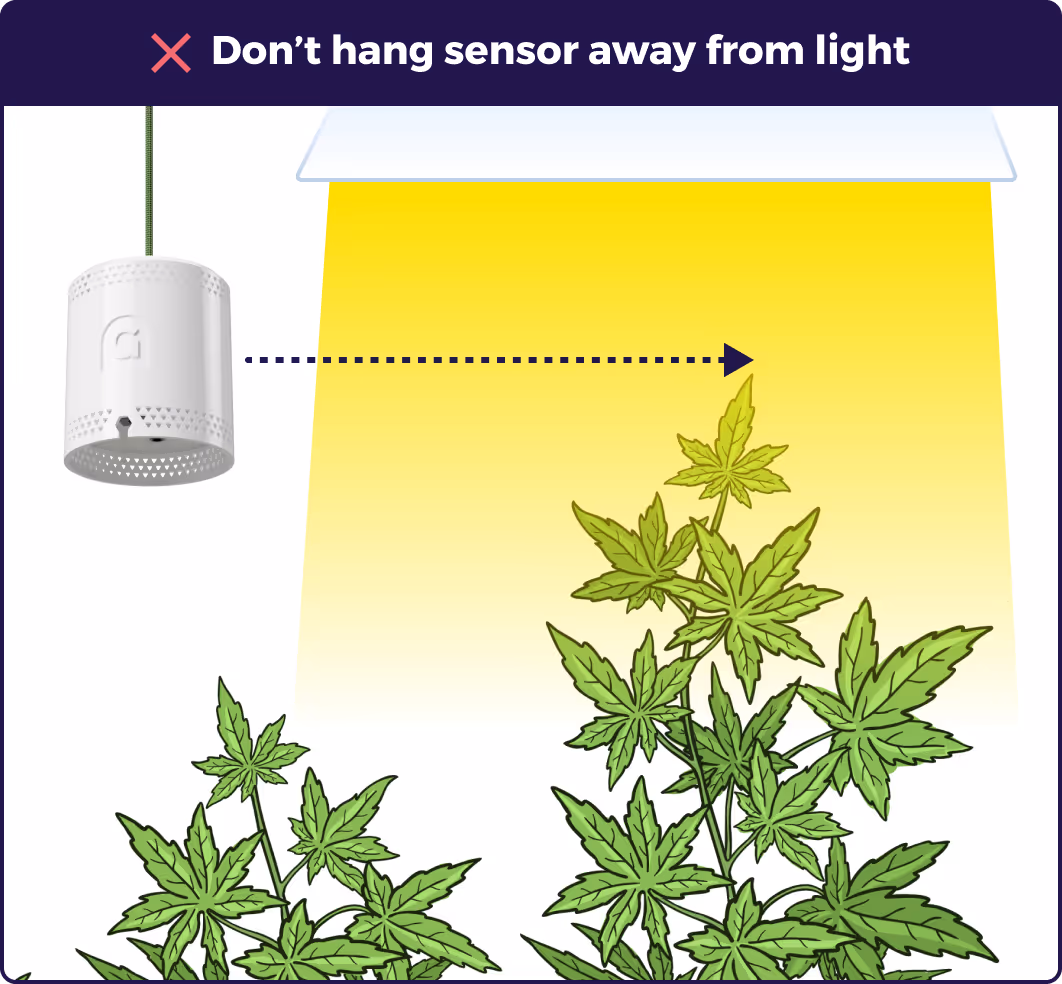
This is where the real danger lies: If the sensor is left too low, it reports the cooler air temperature of the lower sections.
When sensors sit too low, they read cooler air from the lower canopy. Growers then over-correct by raising the room temperature. This overheats the top buds, triggering heat stress and terpene degradation.
Conversely, if the sensor is placed too high, it reads rising hot air near the ceiling and prompts growers to overcool the grow room environment.
This causes the canopy apex (the very top of the canopy) to run too cold, which stalls the synthesis of volatile terpenes and reduces potency.
Getting the sensor placement perfect is crucial for preserving these valuable compounds.
The biggest flaw we found in old methods was simply the time and effort required to correct the position.
Many sensors, like the Pulse Pro, are simply hung from a power cable or let you tie your own rope or string onto the case.
These common methods almost always result in a slight tilt, meaning if your sensors take light readings from the top of the sensor, your light measurements will be inaccurate.
The sensor's PPFD sensor placement must be perfectly level to measure light intensity from your main grow lights accurately.
If the sensor is tilted, the light sensor views the grow room at an angle, resulting in faulty readings for PPFD, DLI and PAR.
This is how inaccurate data directly compromises your grow cycle.
The solution: This is precisely why we custom-engineered our grow sensor hanging system.
If you're tired of guessing and risking inaccurate data due to sensor tilt, the Grow Sensor is the only solution to guarantee a straight, perfect setup.
Hanging a sensor lower than the canopy or near a tent wall is useless for monitoring your indoor grow.
The fastest and most important growth will happen at the canopy apex.
If your sensor is not there, you are trying to measure the wrong part of the environment, as the environment at the top of the plant is significantly different from that lower down the plant.
The solution: Stop measuring the wrong part of the room.
Our system provides you with the flexibility to place the sensor precisely at the canopy level - the most critical point for data collection.
Fed up with second-guessing your data? Our hanging system solves all three flaws, ensuring accurate readings from seed to harvest.
After trialling over 15 different prototypes, ranging from complex latching mechanisms to traditional guy ropes used for camping, we realised that the simple solution was the best.
Every component of the grow room sensor hanging system is engineered to guarantee precision.
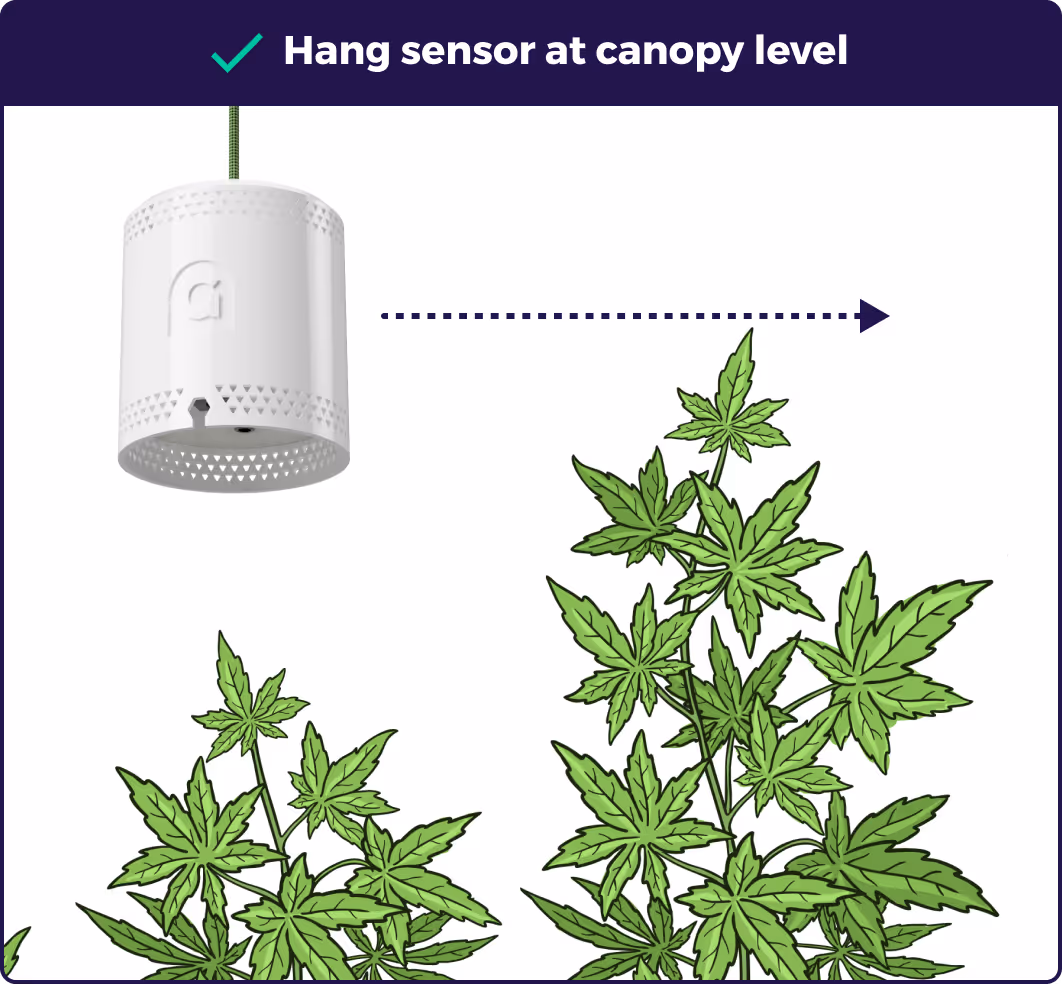
The top of your sensor must remain aligned with the top leaf of your plant canopy, especially in flower.
This is the point where you need real time data to optimise your environment for the best growth.
To achieve this, we designed the following system:
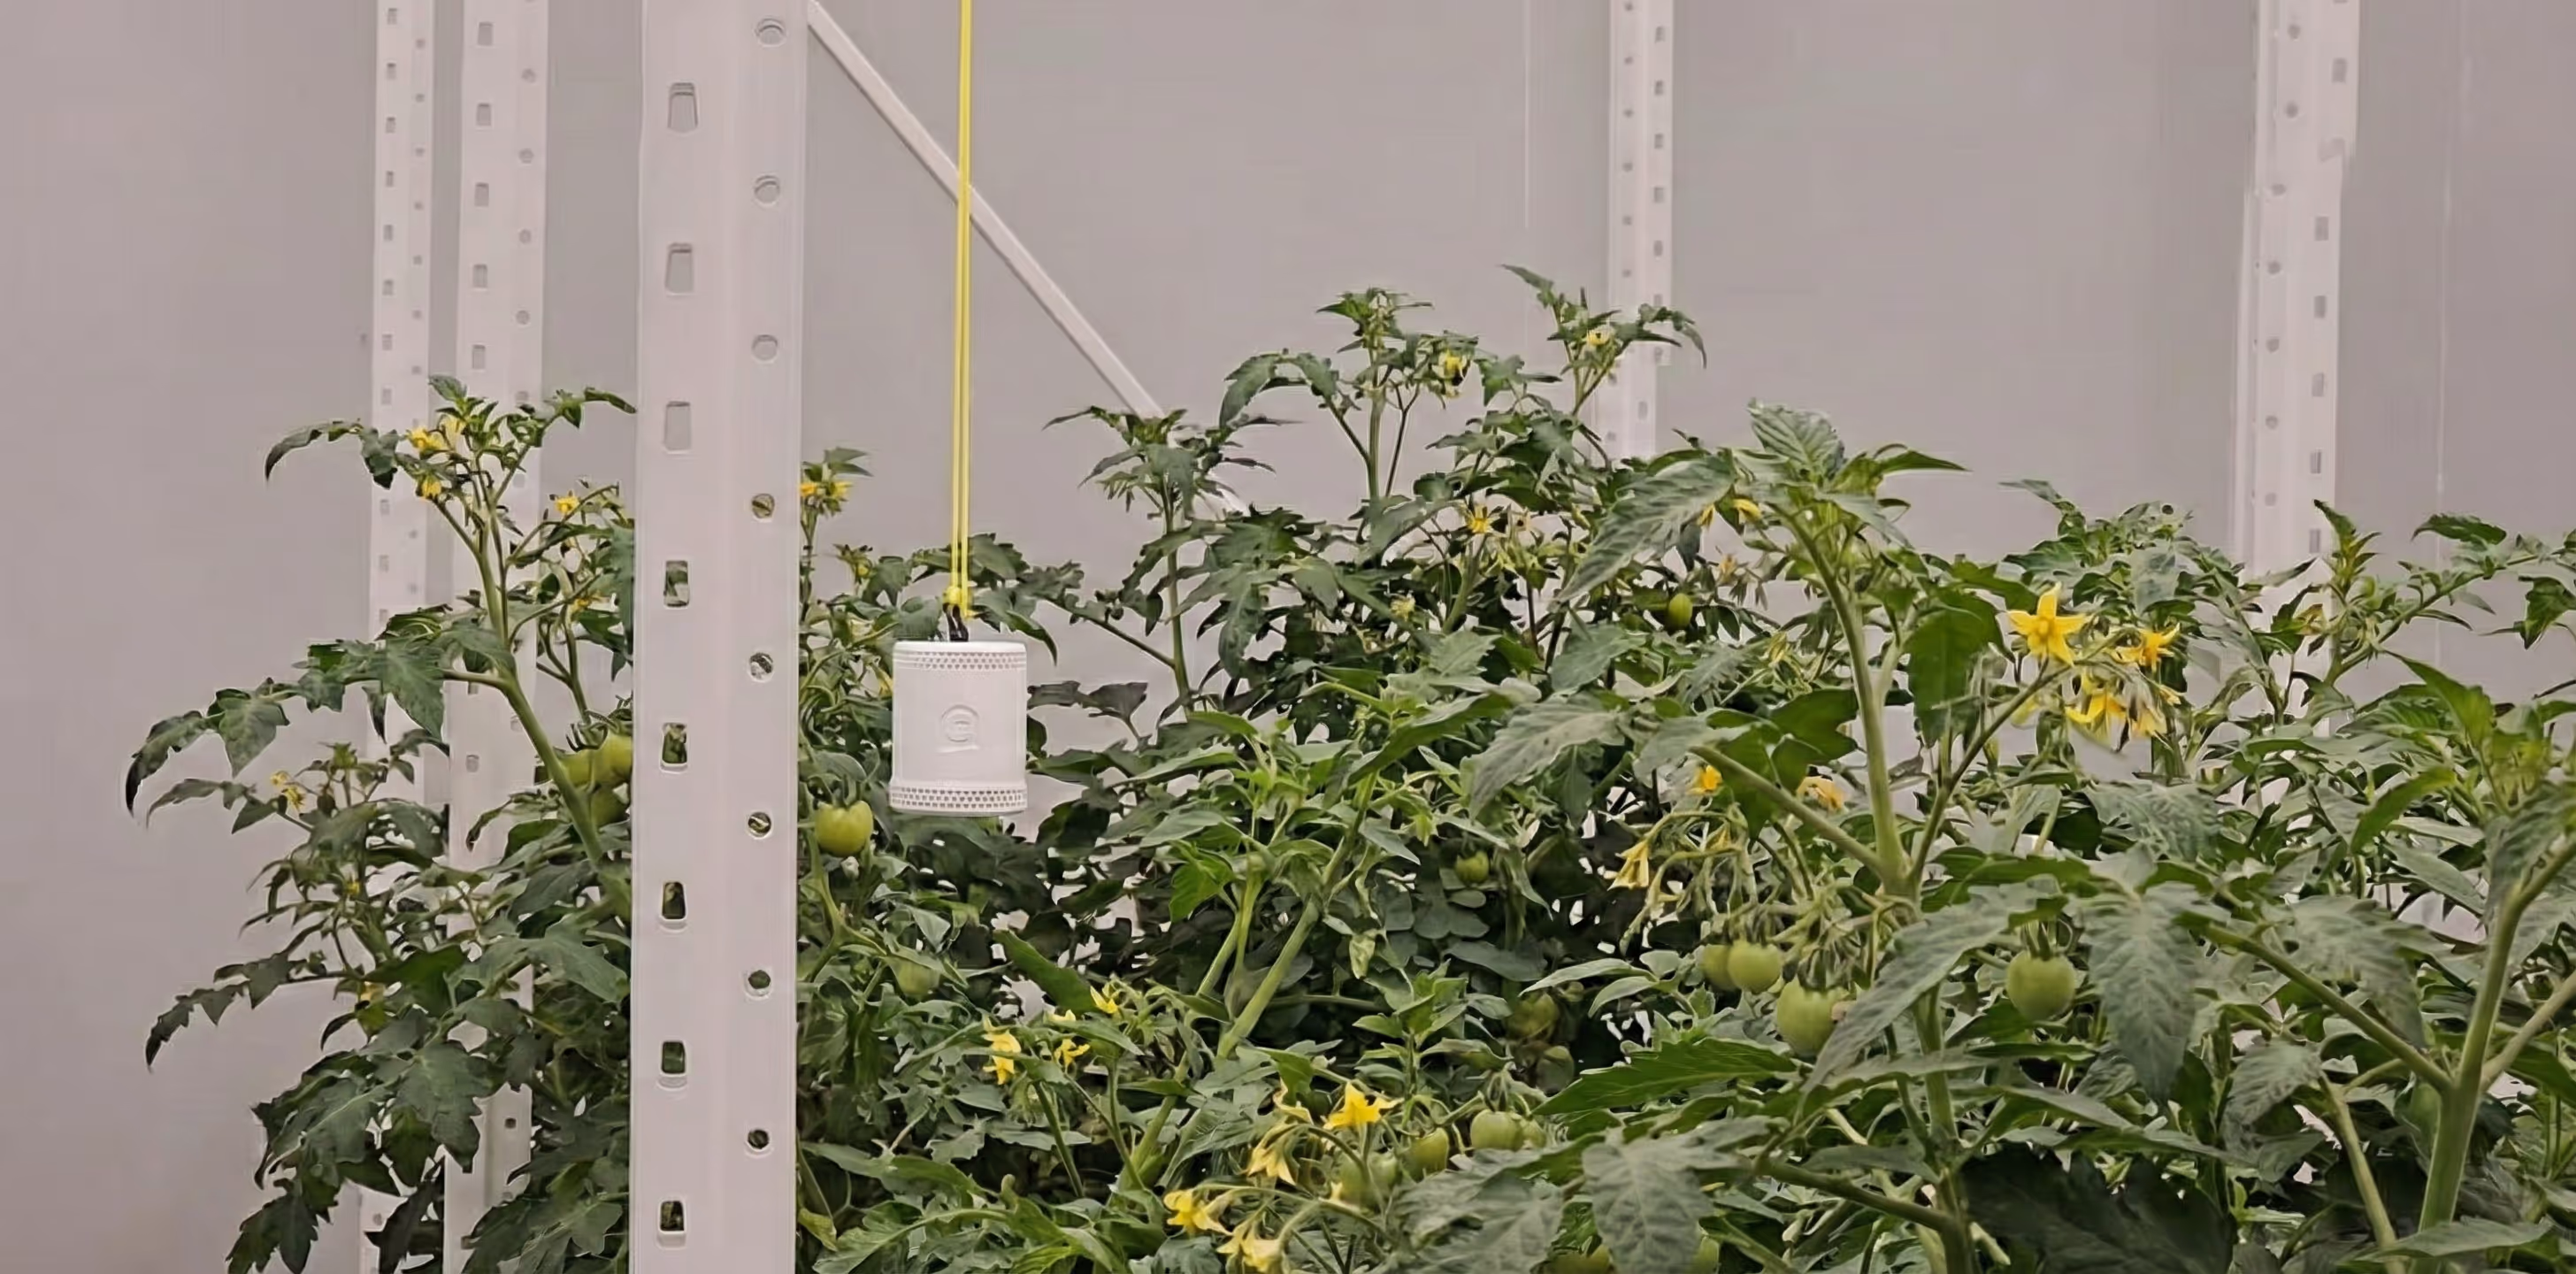
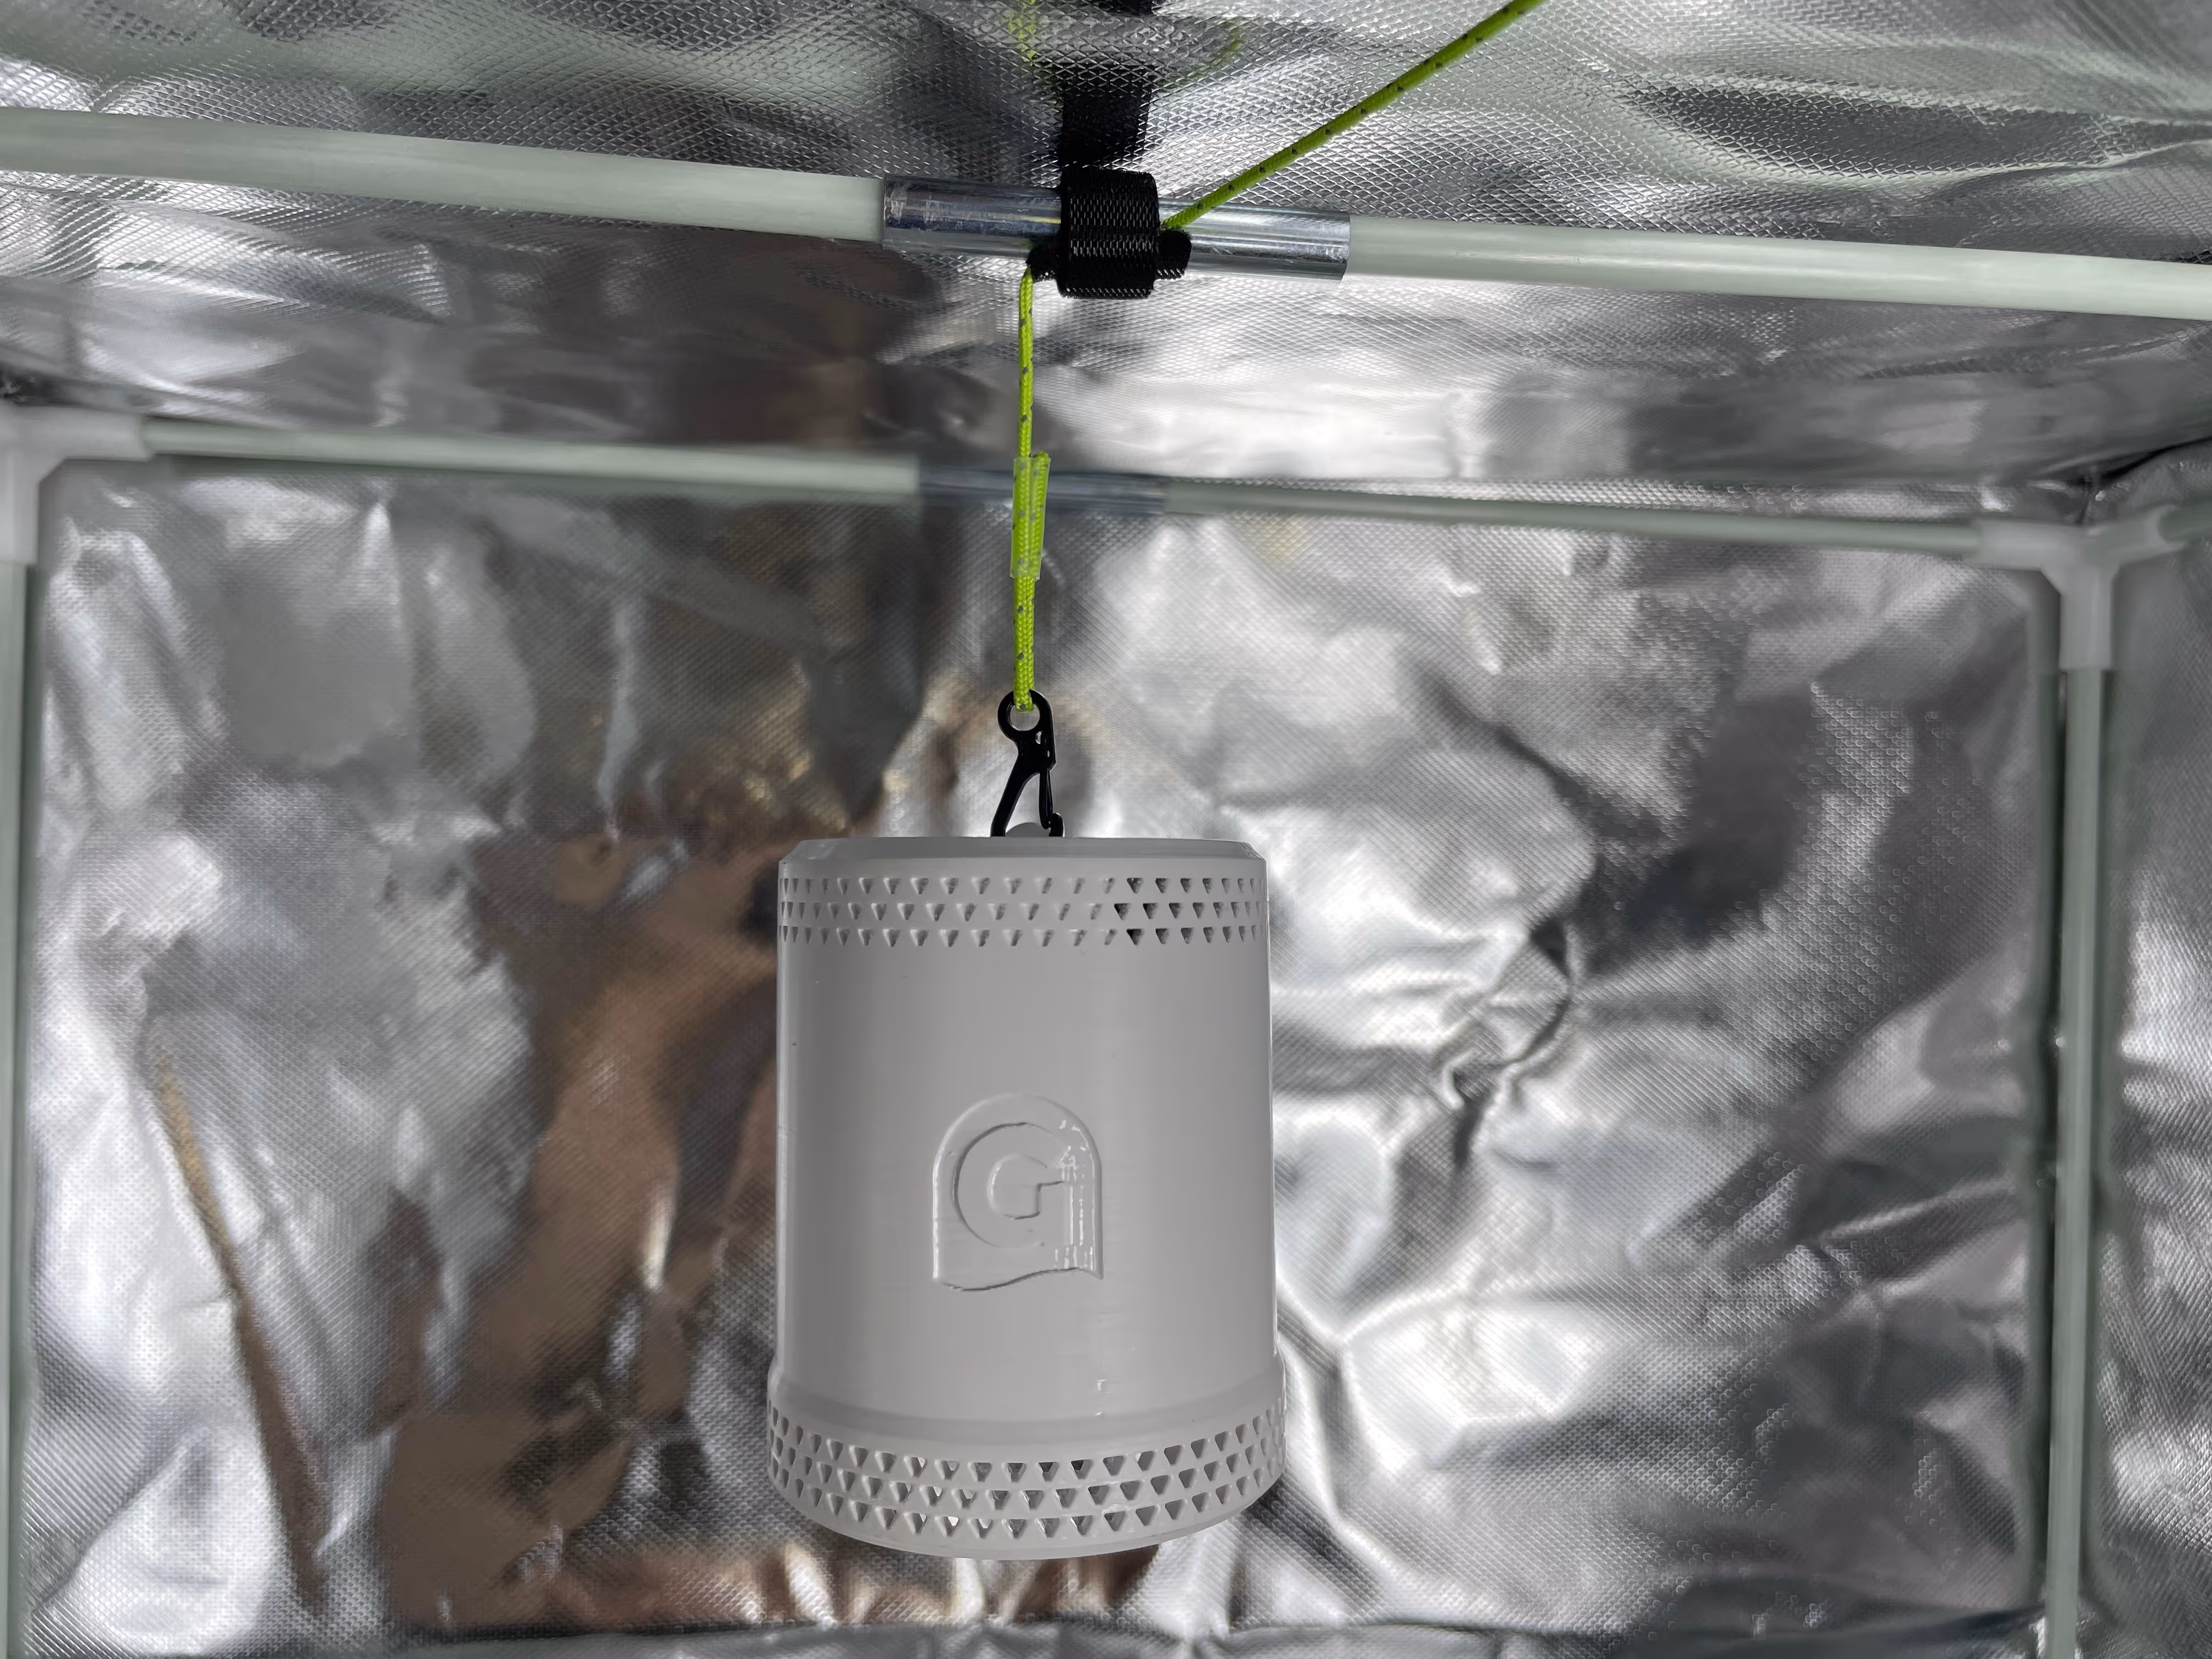
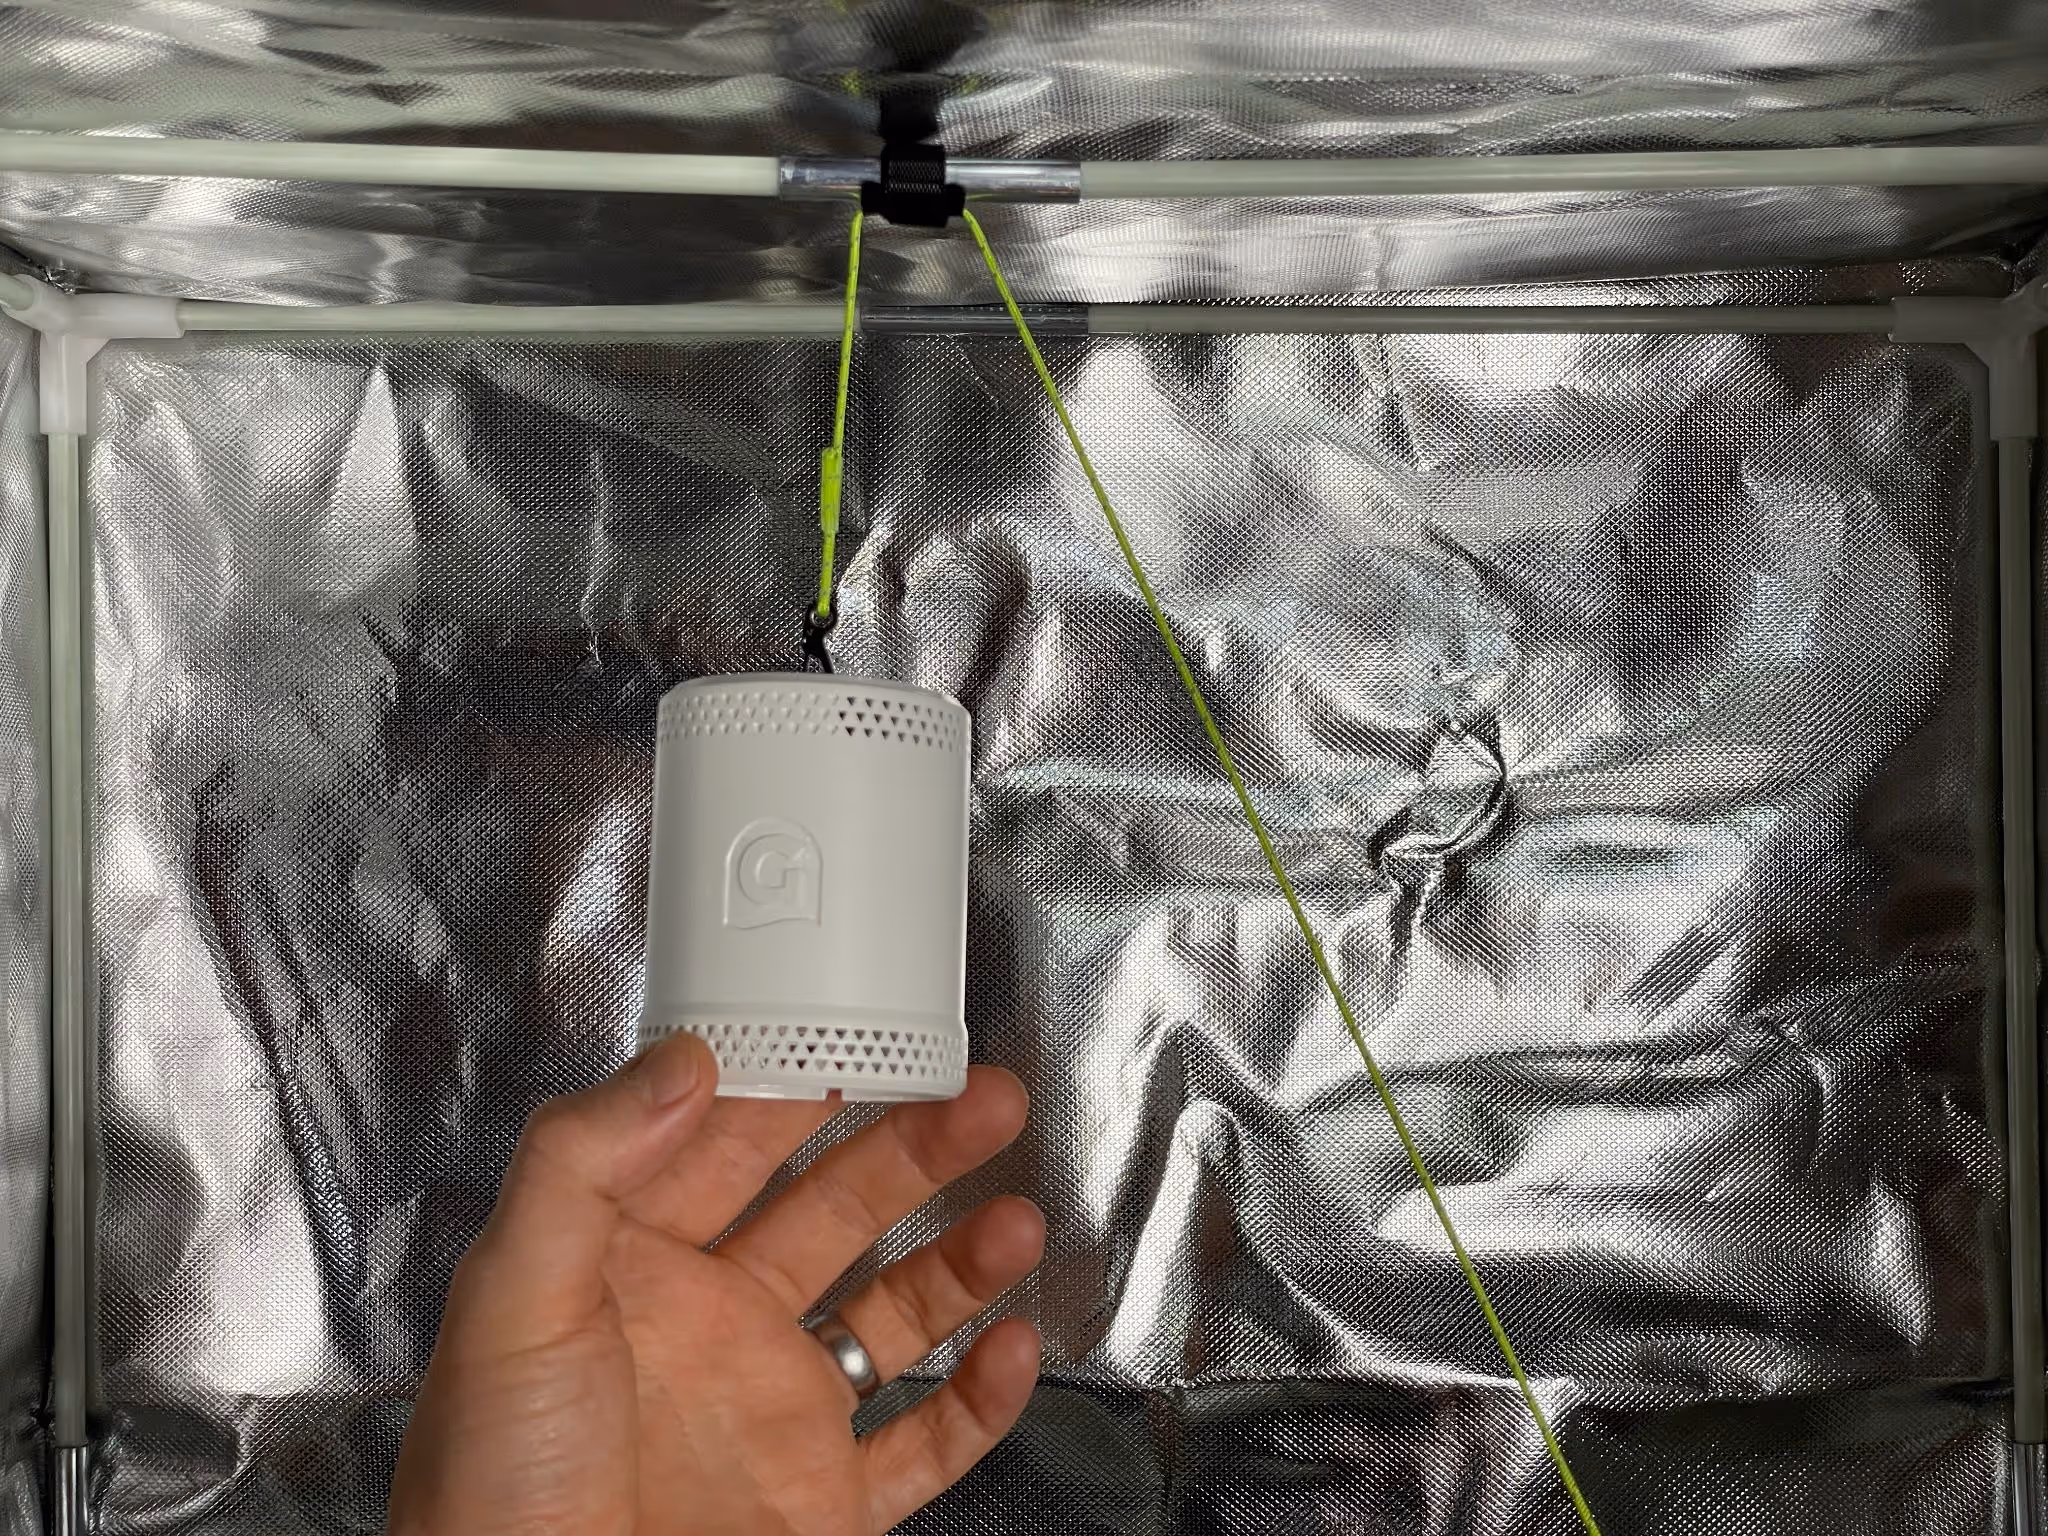
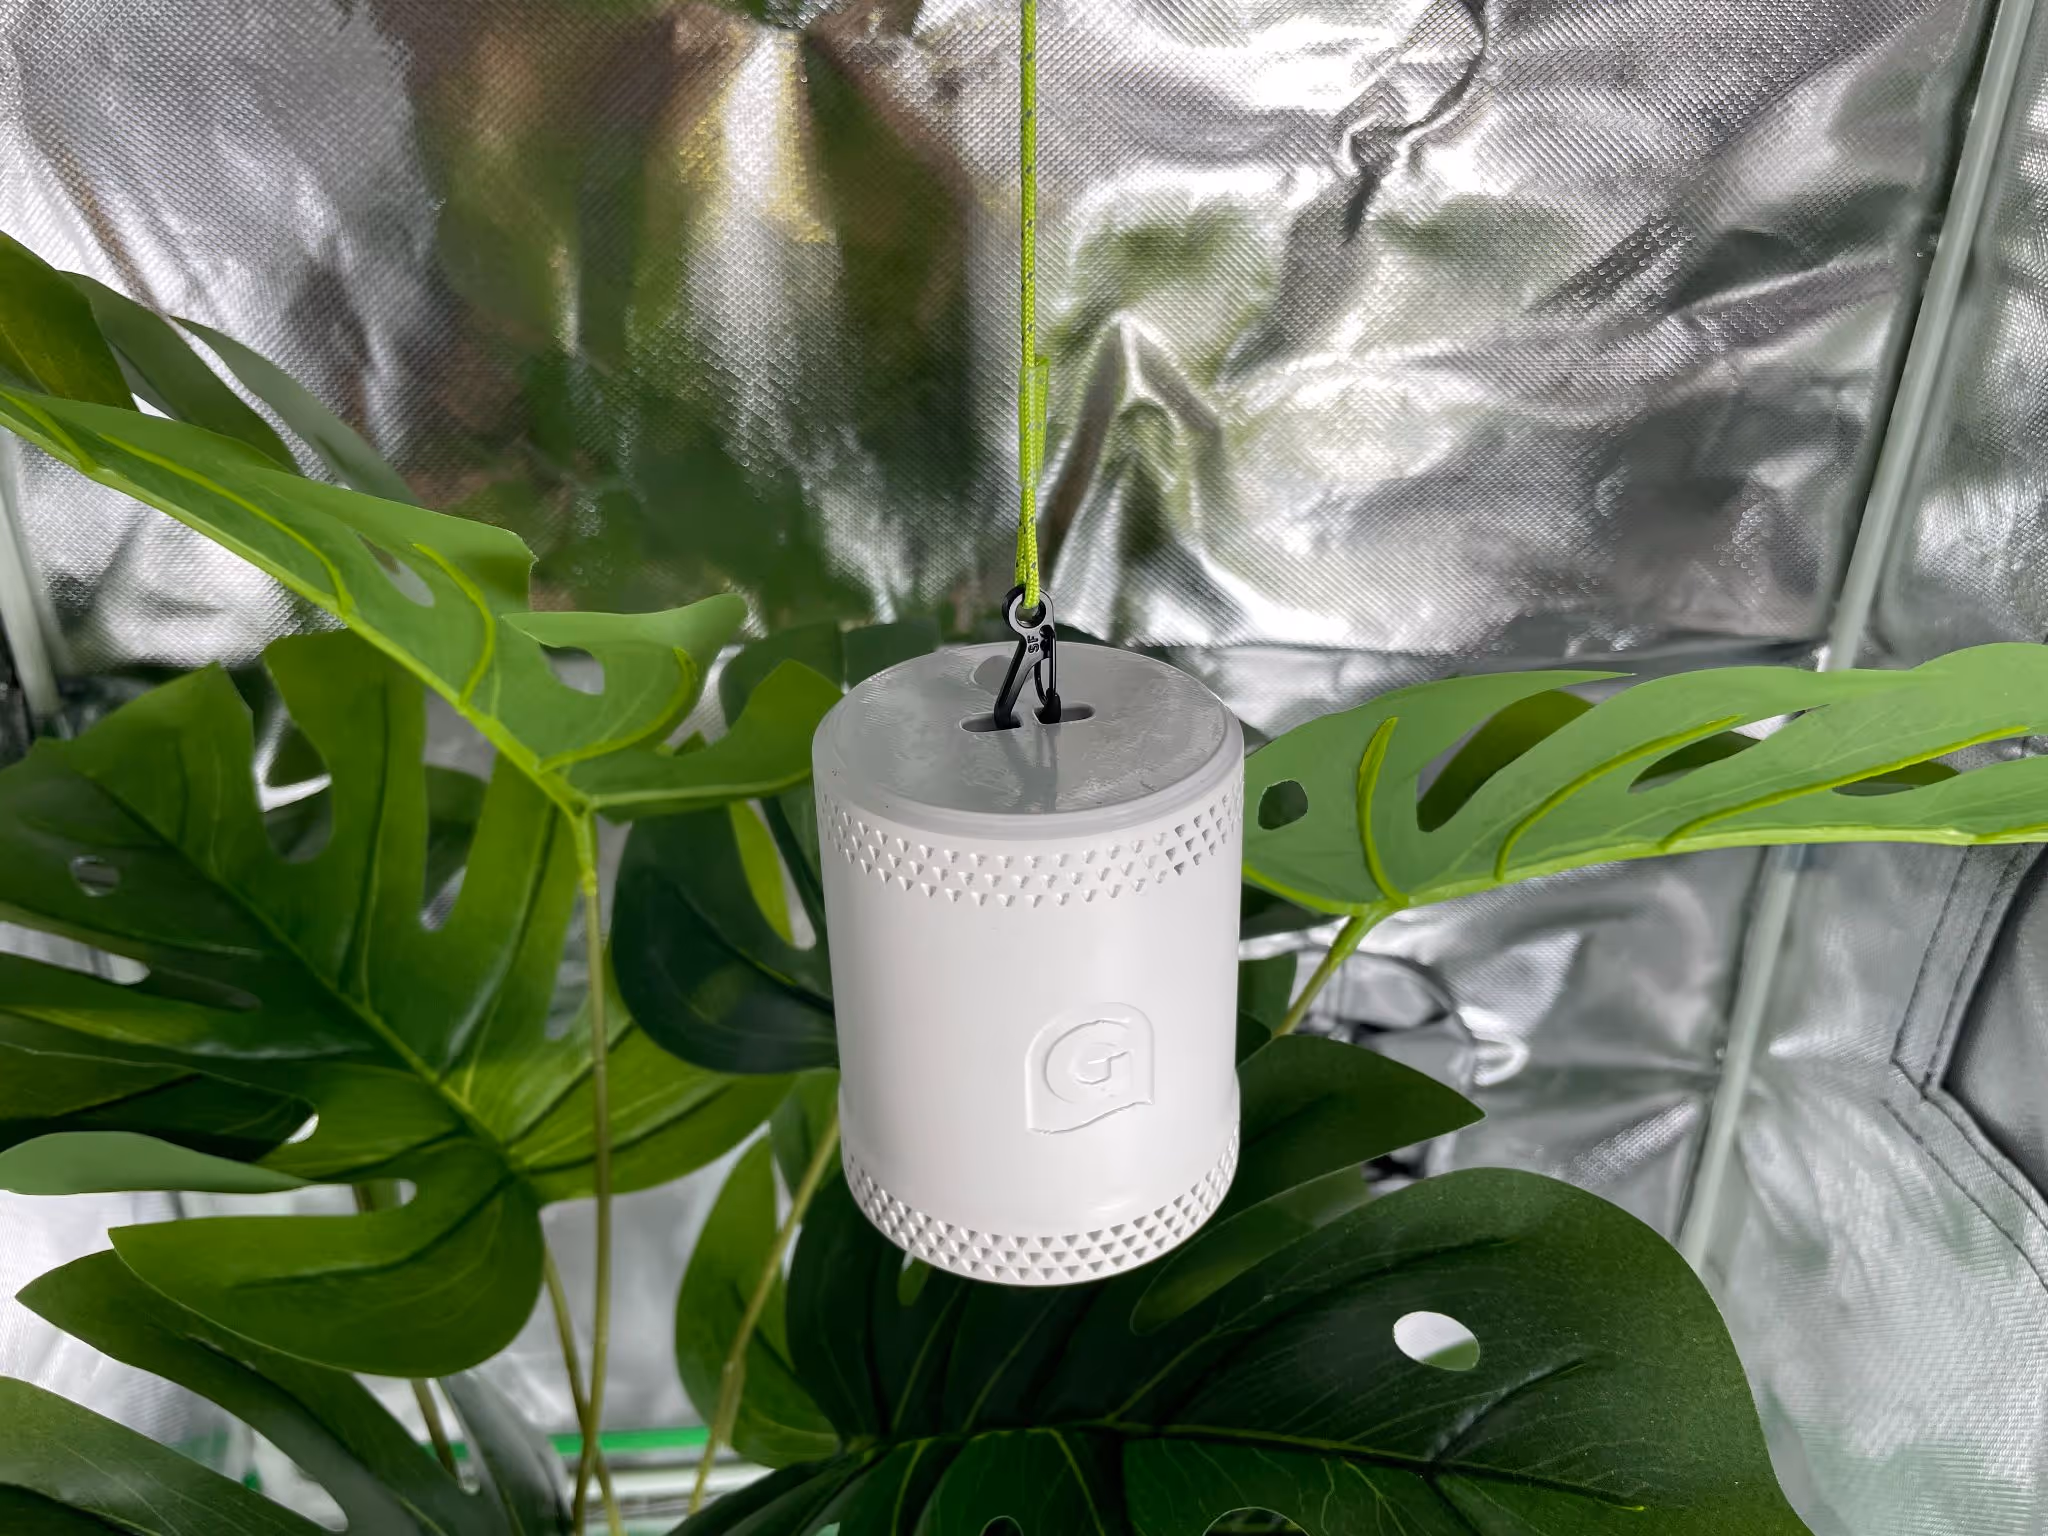
The housing and carabiner system ensures the sensor hangs perfectly straight, eliminating the tilt issue to guarantee accurate readings for par meter metrics.
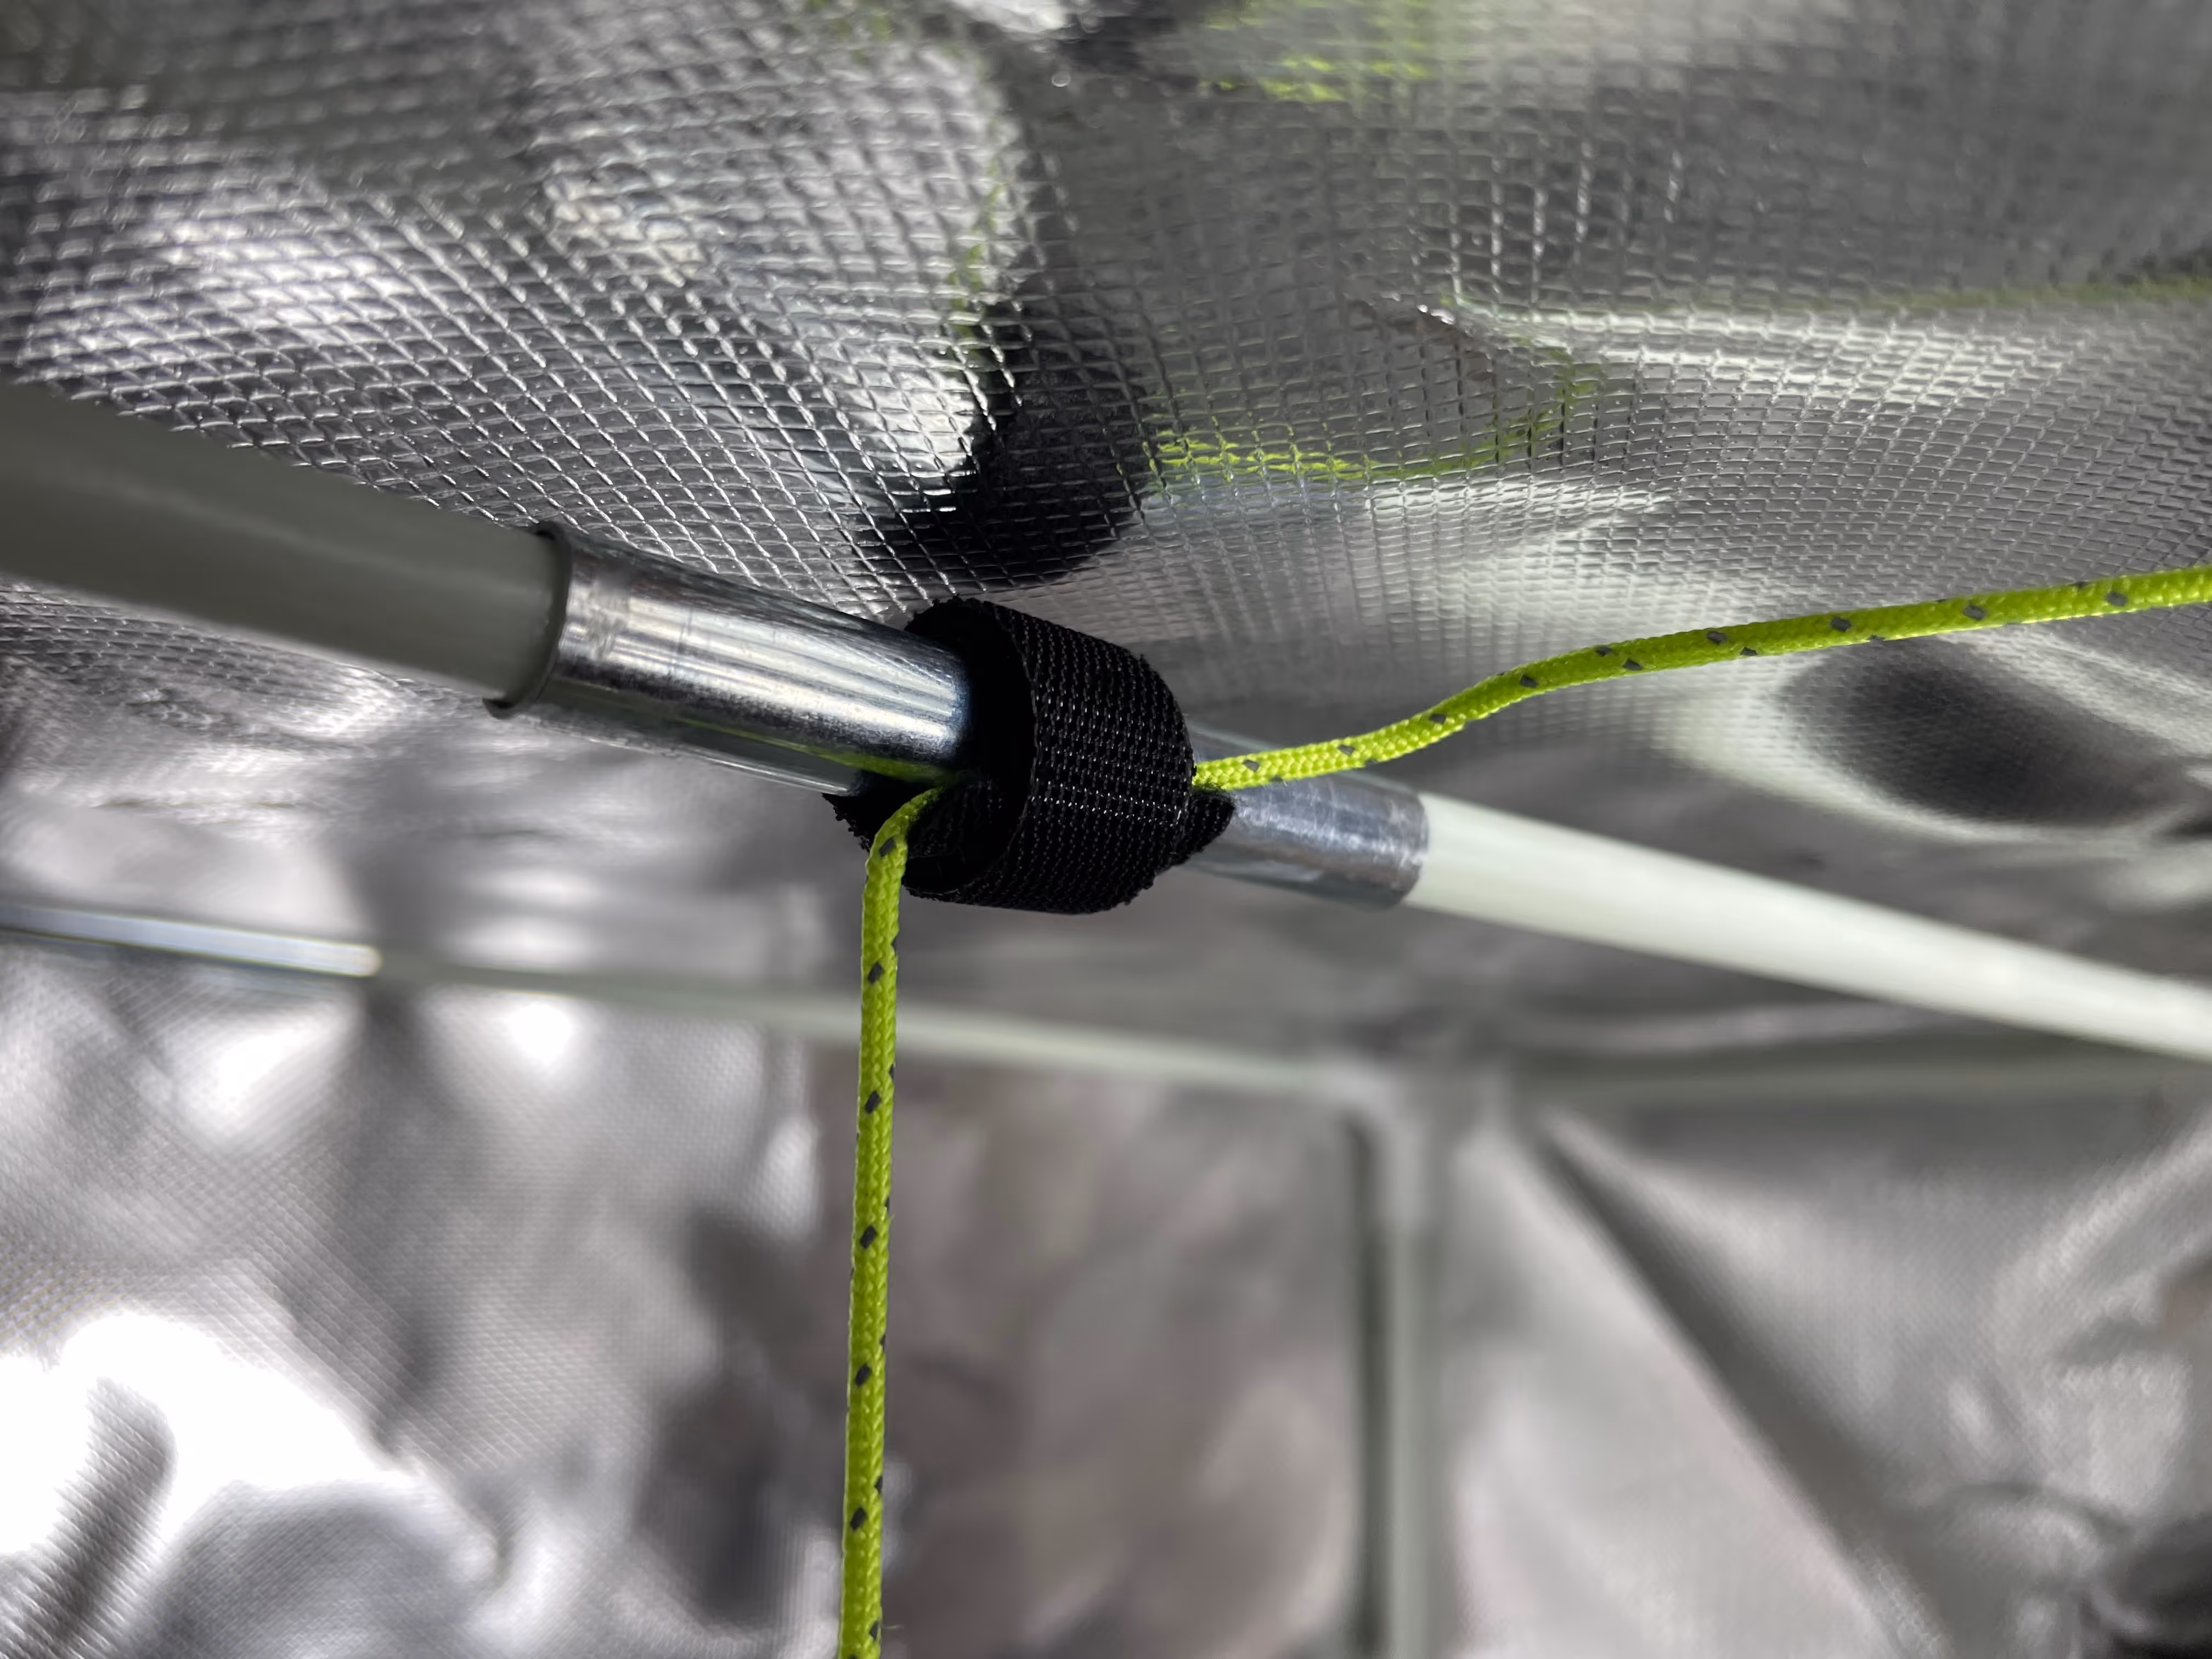
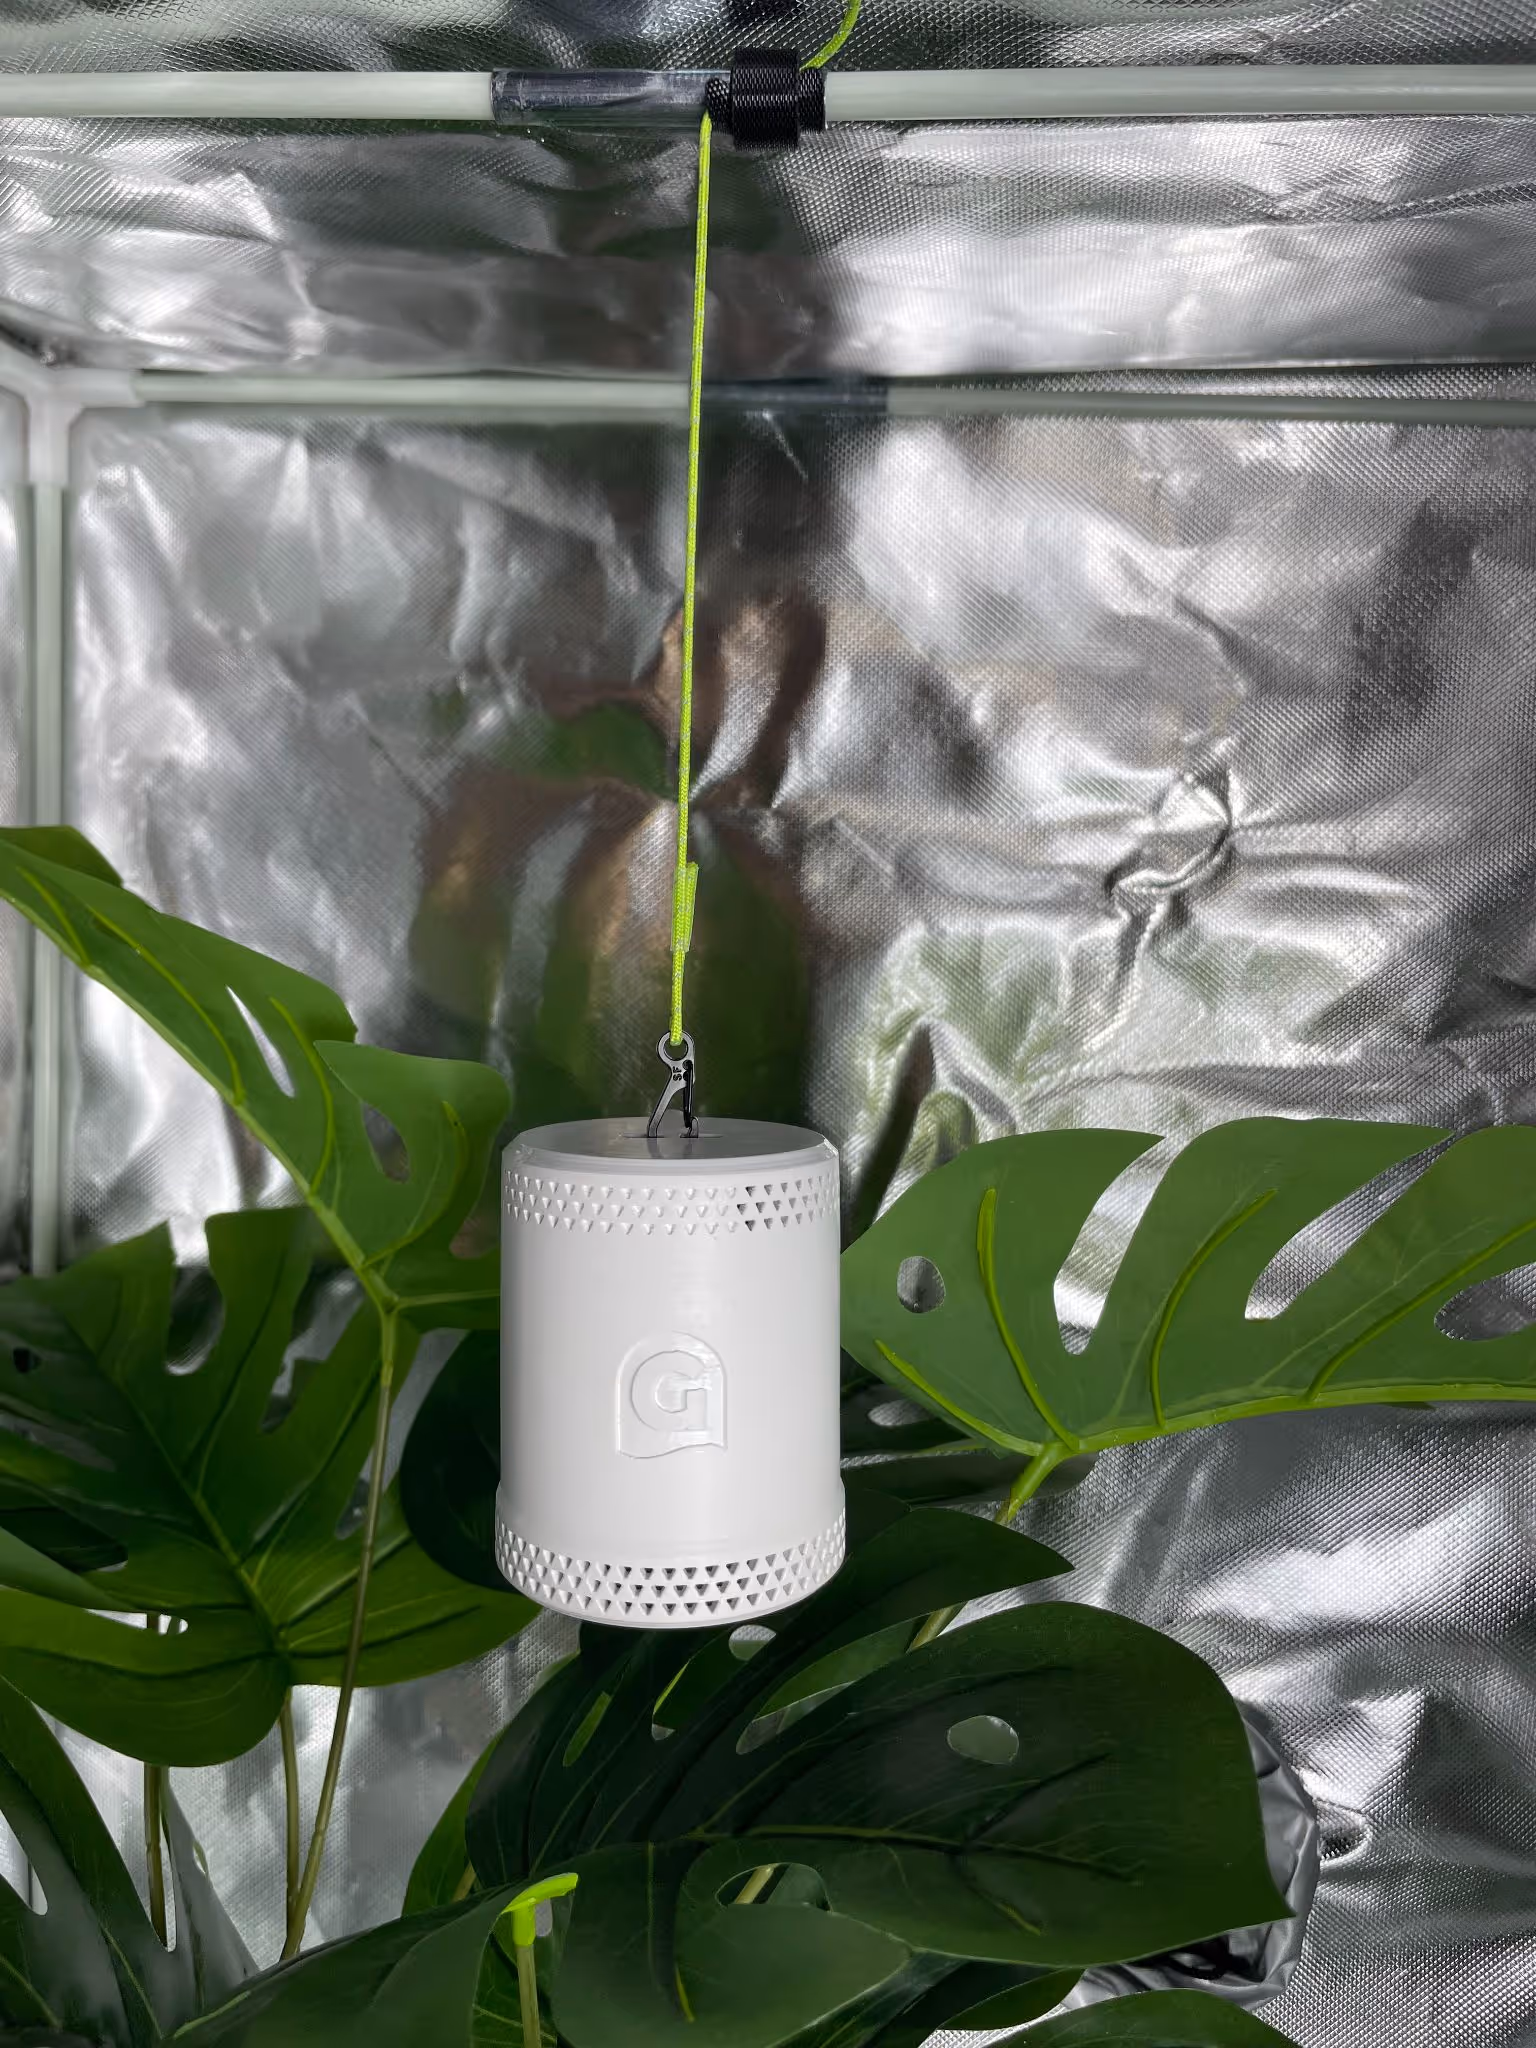
This high-strength, UV-resistant strap attaches securely to a grow space or grow tent crossbar.
The unique locking mechanism allows you to raise or lower the sensor effortlessly (even from outside the tent) by pulling the paracord.
This makes the daily non-negotiable adjustments a hassle-free part of your routine.
This saves significant time compared to fiddling with knots inside the crowded canopy, risking damage to your plants.
Our hanging setup also allows you to very easily move the velcro strap and attached sensor left and right along the crossbar, making it simple to position the sensor precisely above a leaf.
We use strong paracord (rated to 40kg) that is long enough for both a small tent and a large grow room. It is 5 meters as standard, but we can provide longer on request.
It is UV-resistant and has high-humidity tolerance.
Crucially, it is bright-colored so you can avoid accidentally cutting it.
The final design was chosen because it provides uncompromised strength, security, and the effortless adjustment required to maintain canopy level.
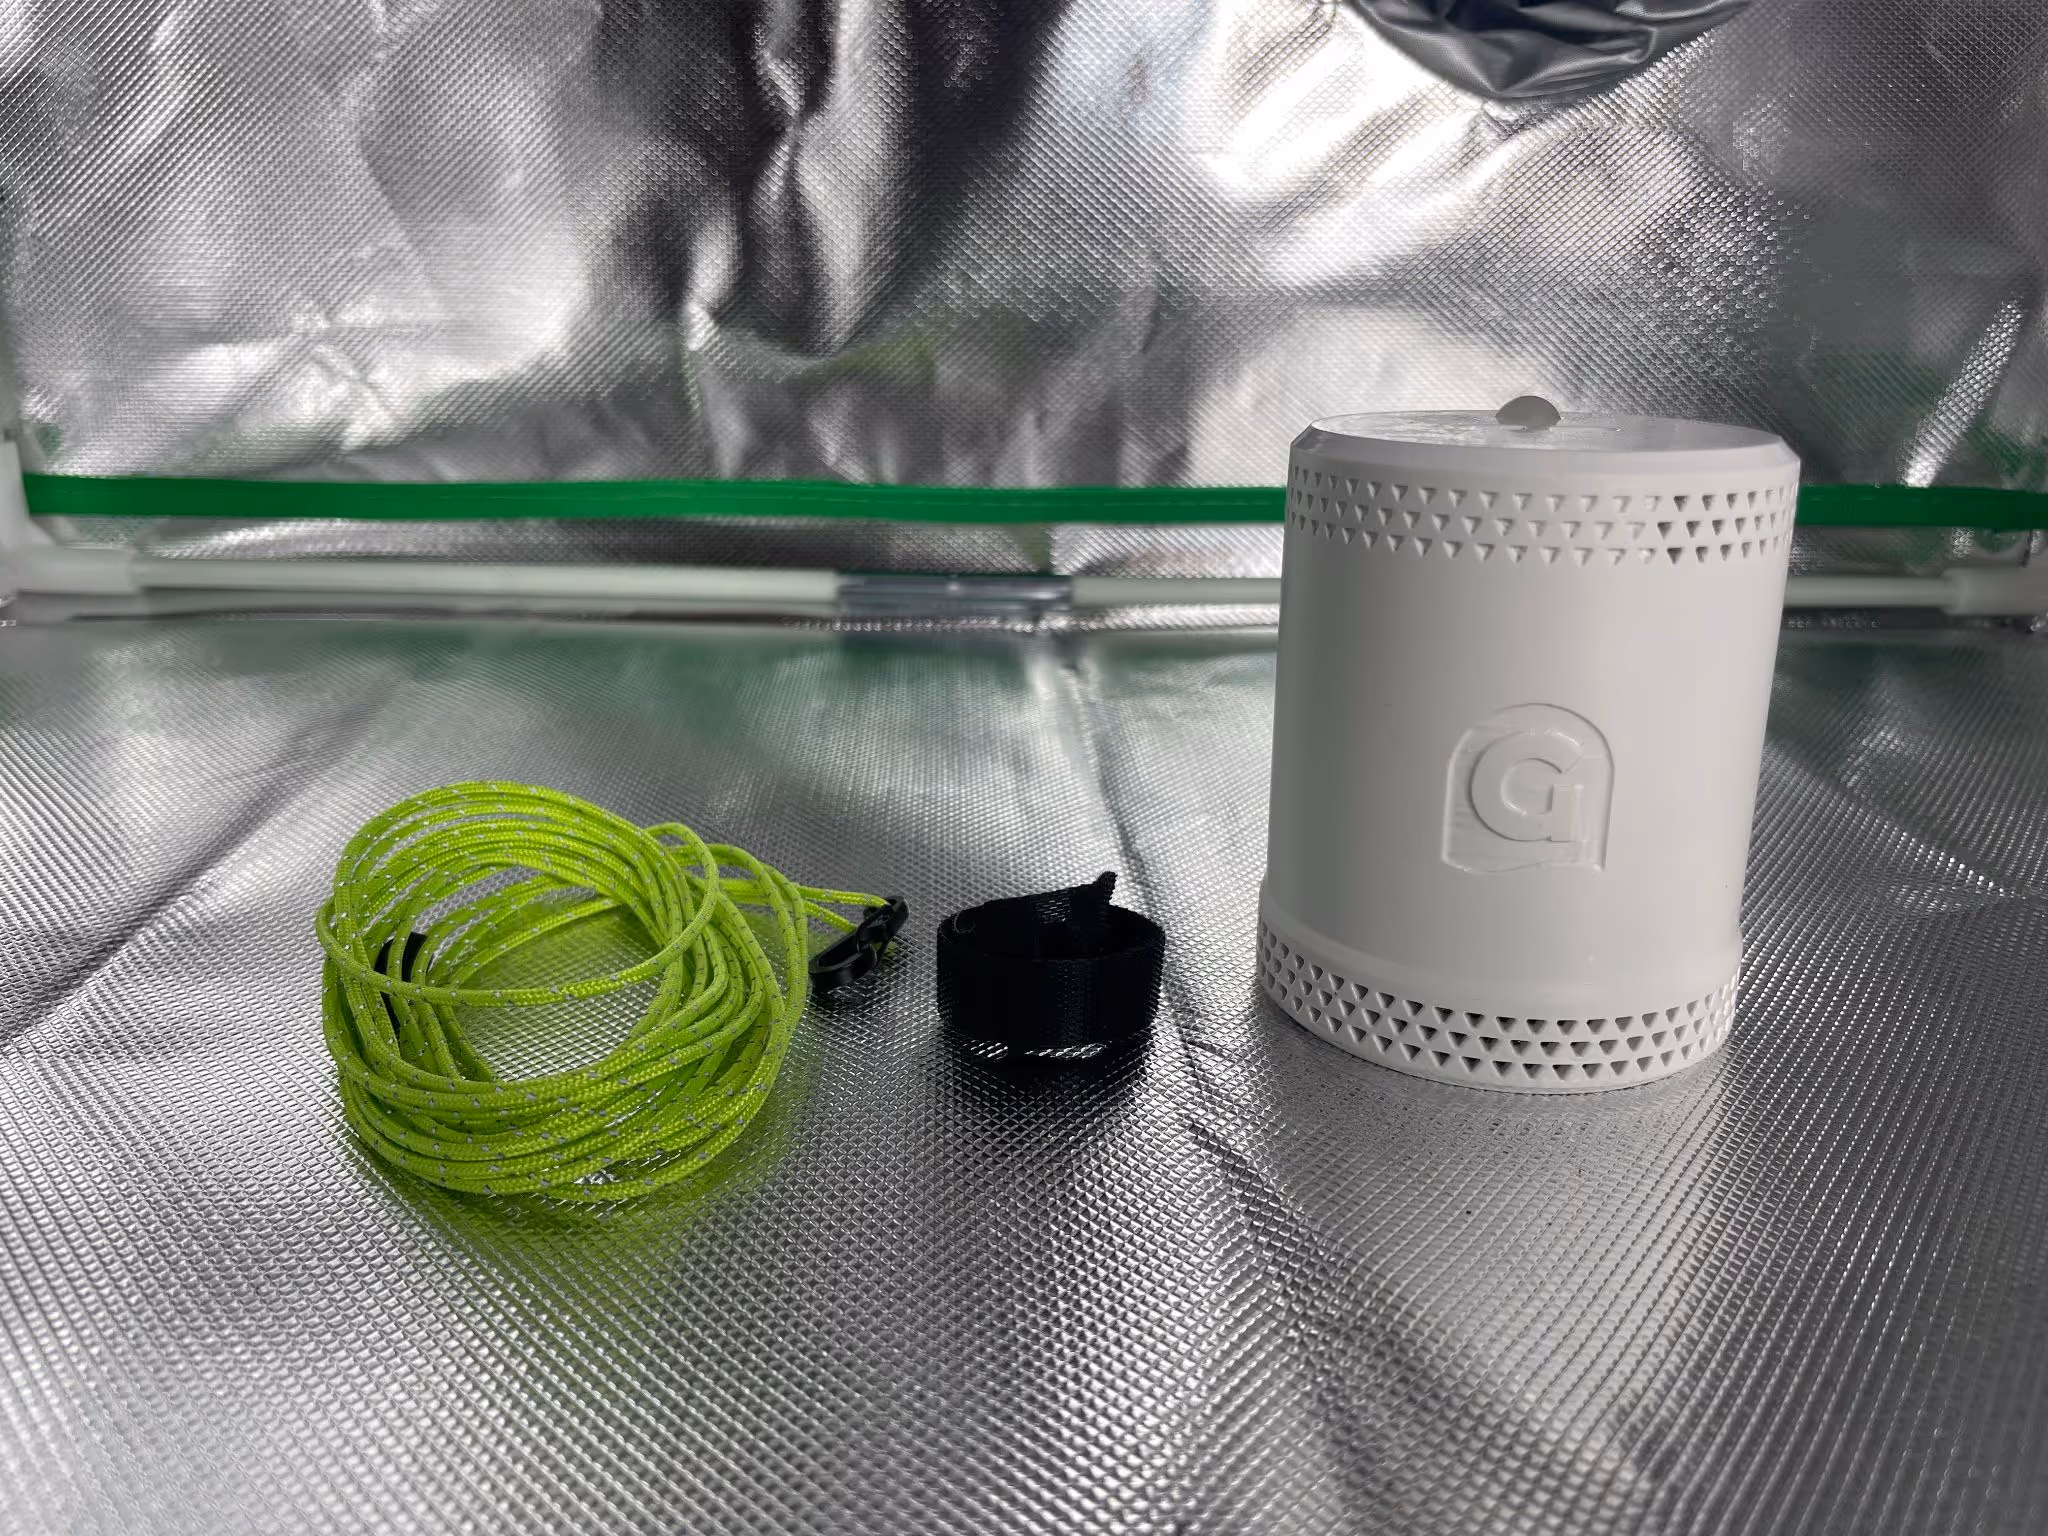
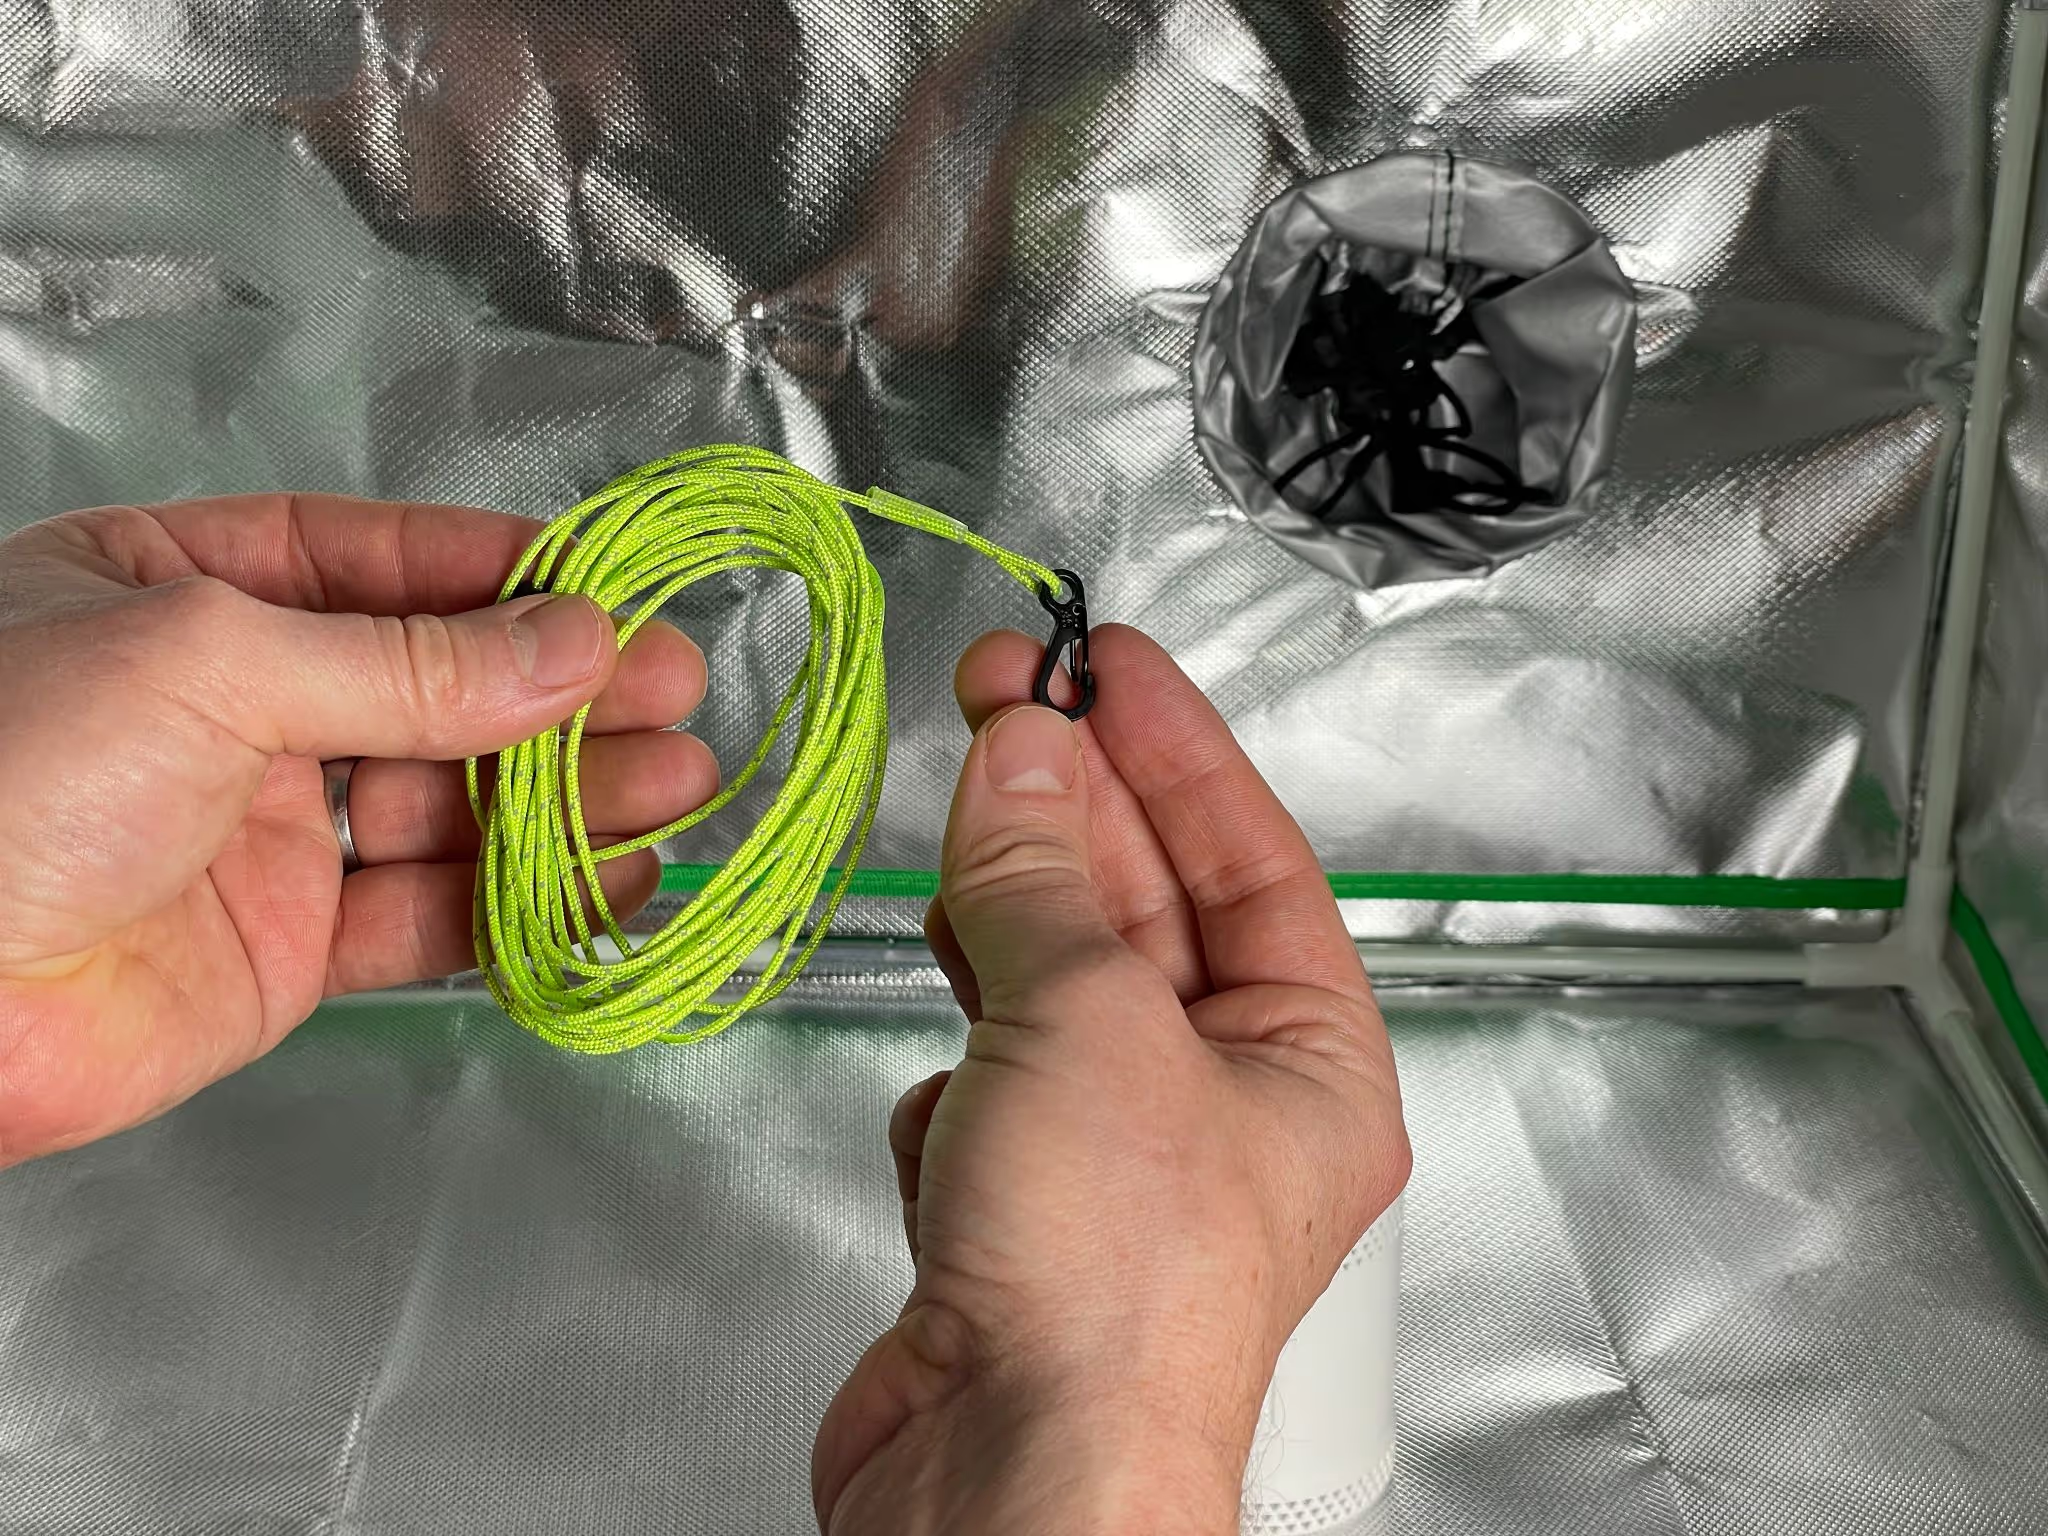
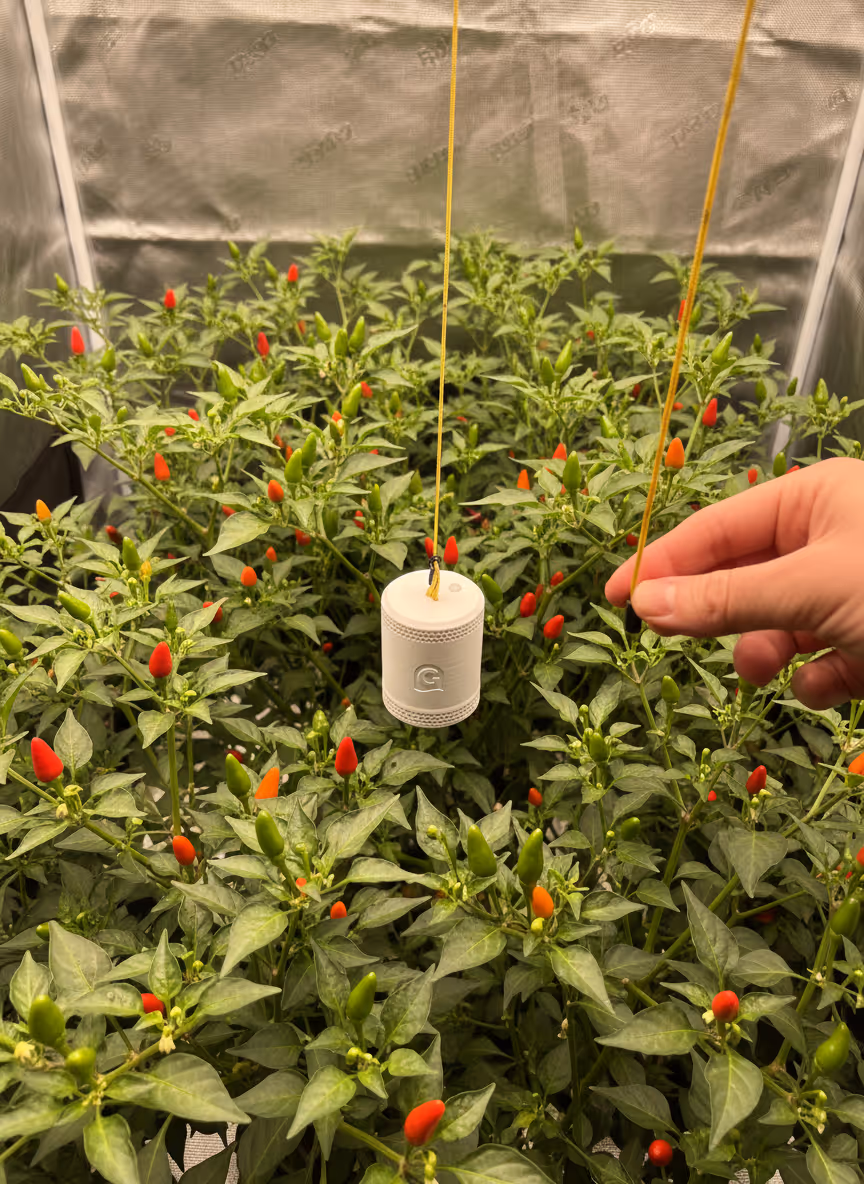
You’ll need the paracord with the attached carabiner, the quick-adjust velcro strap, and the Grow Sensor itself.
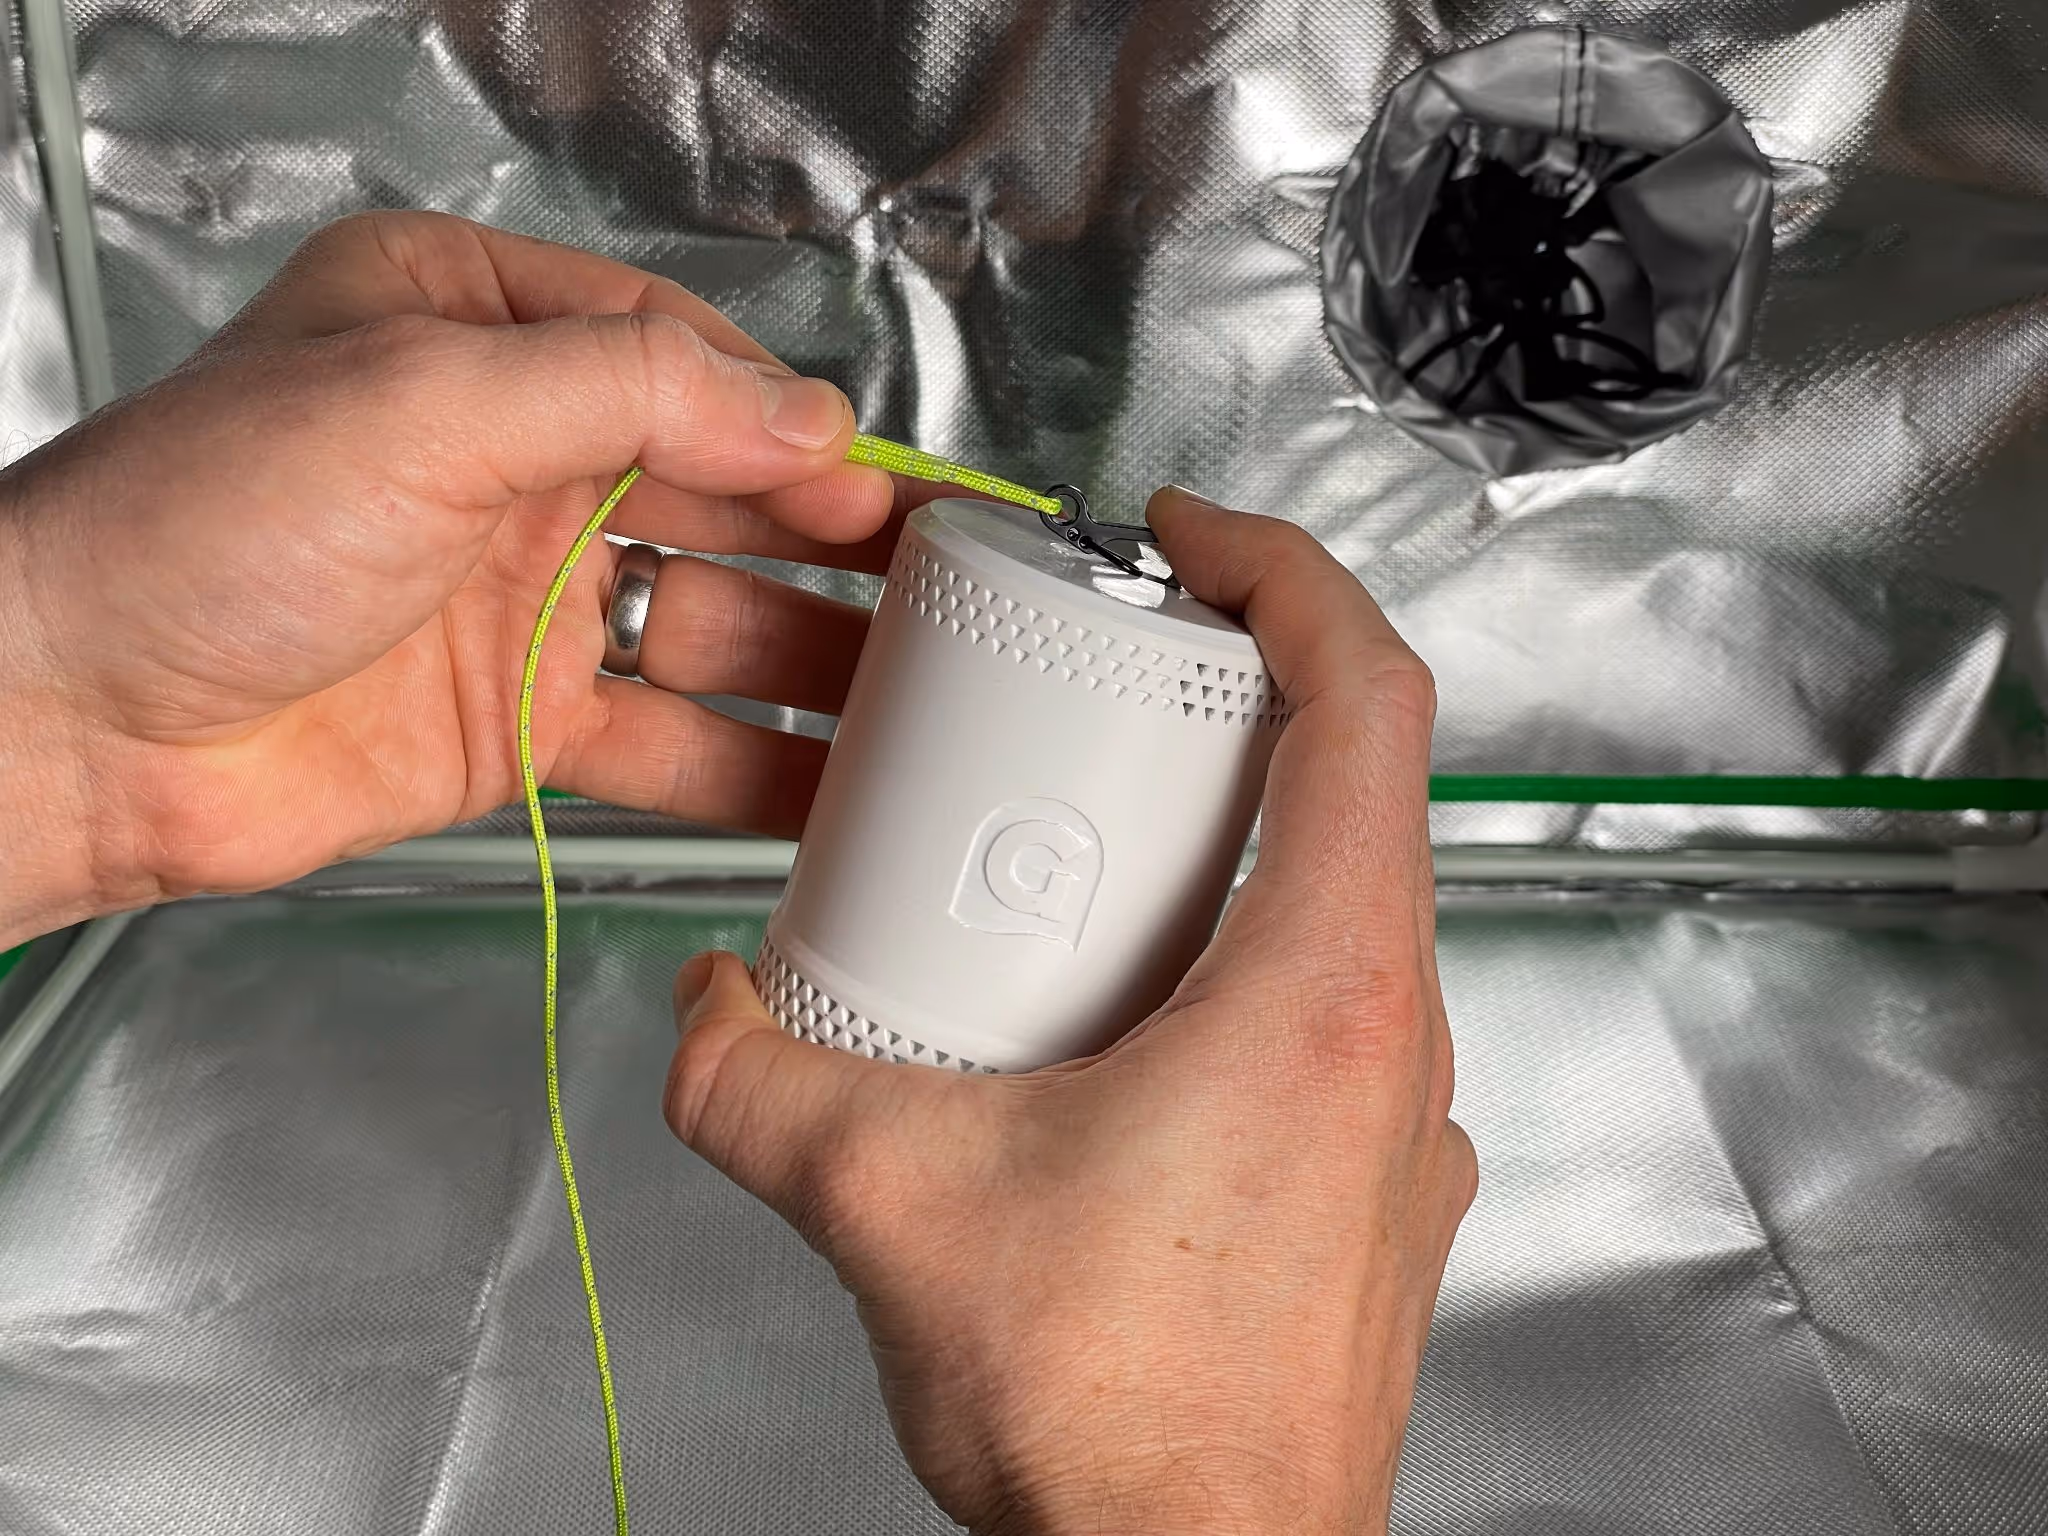
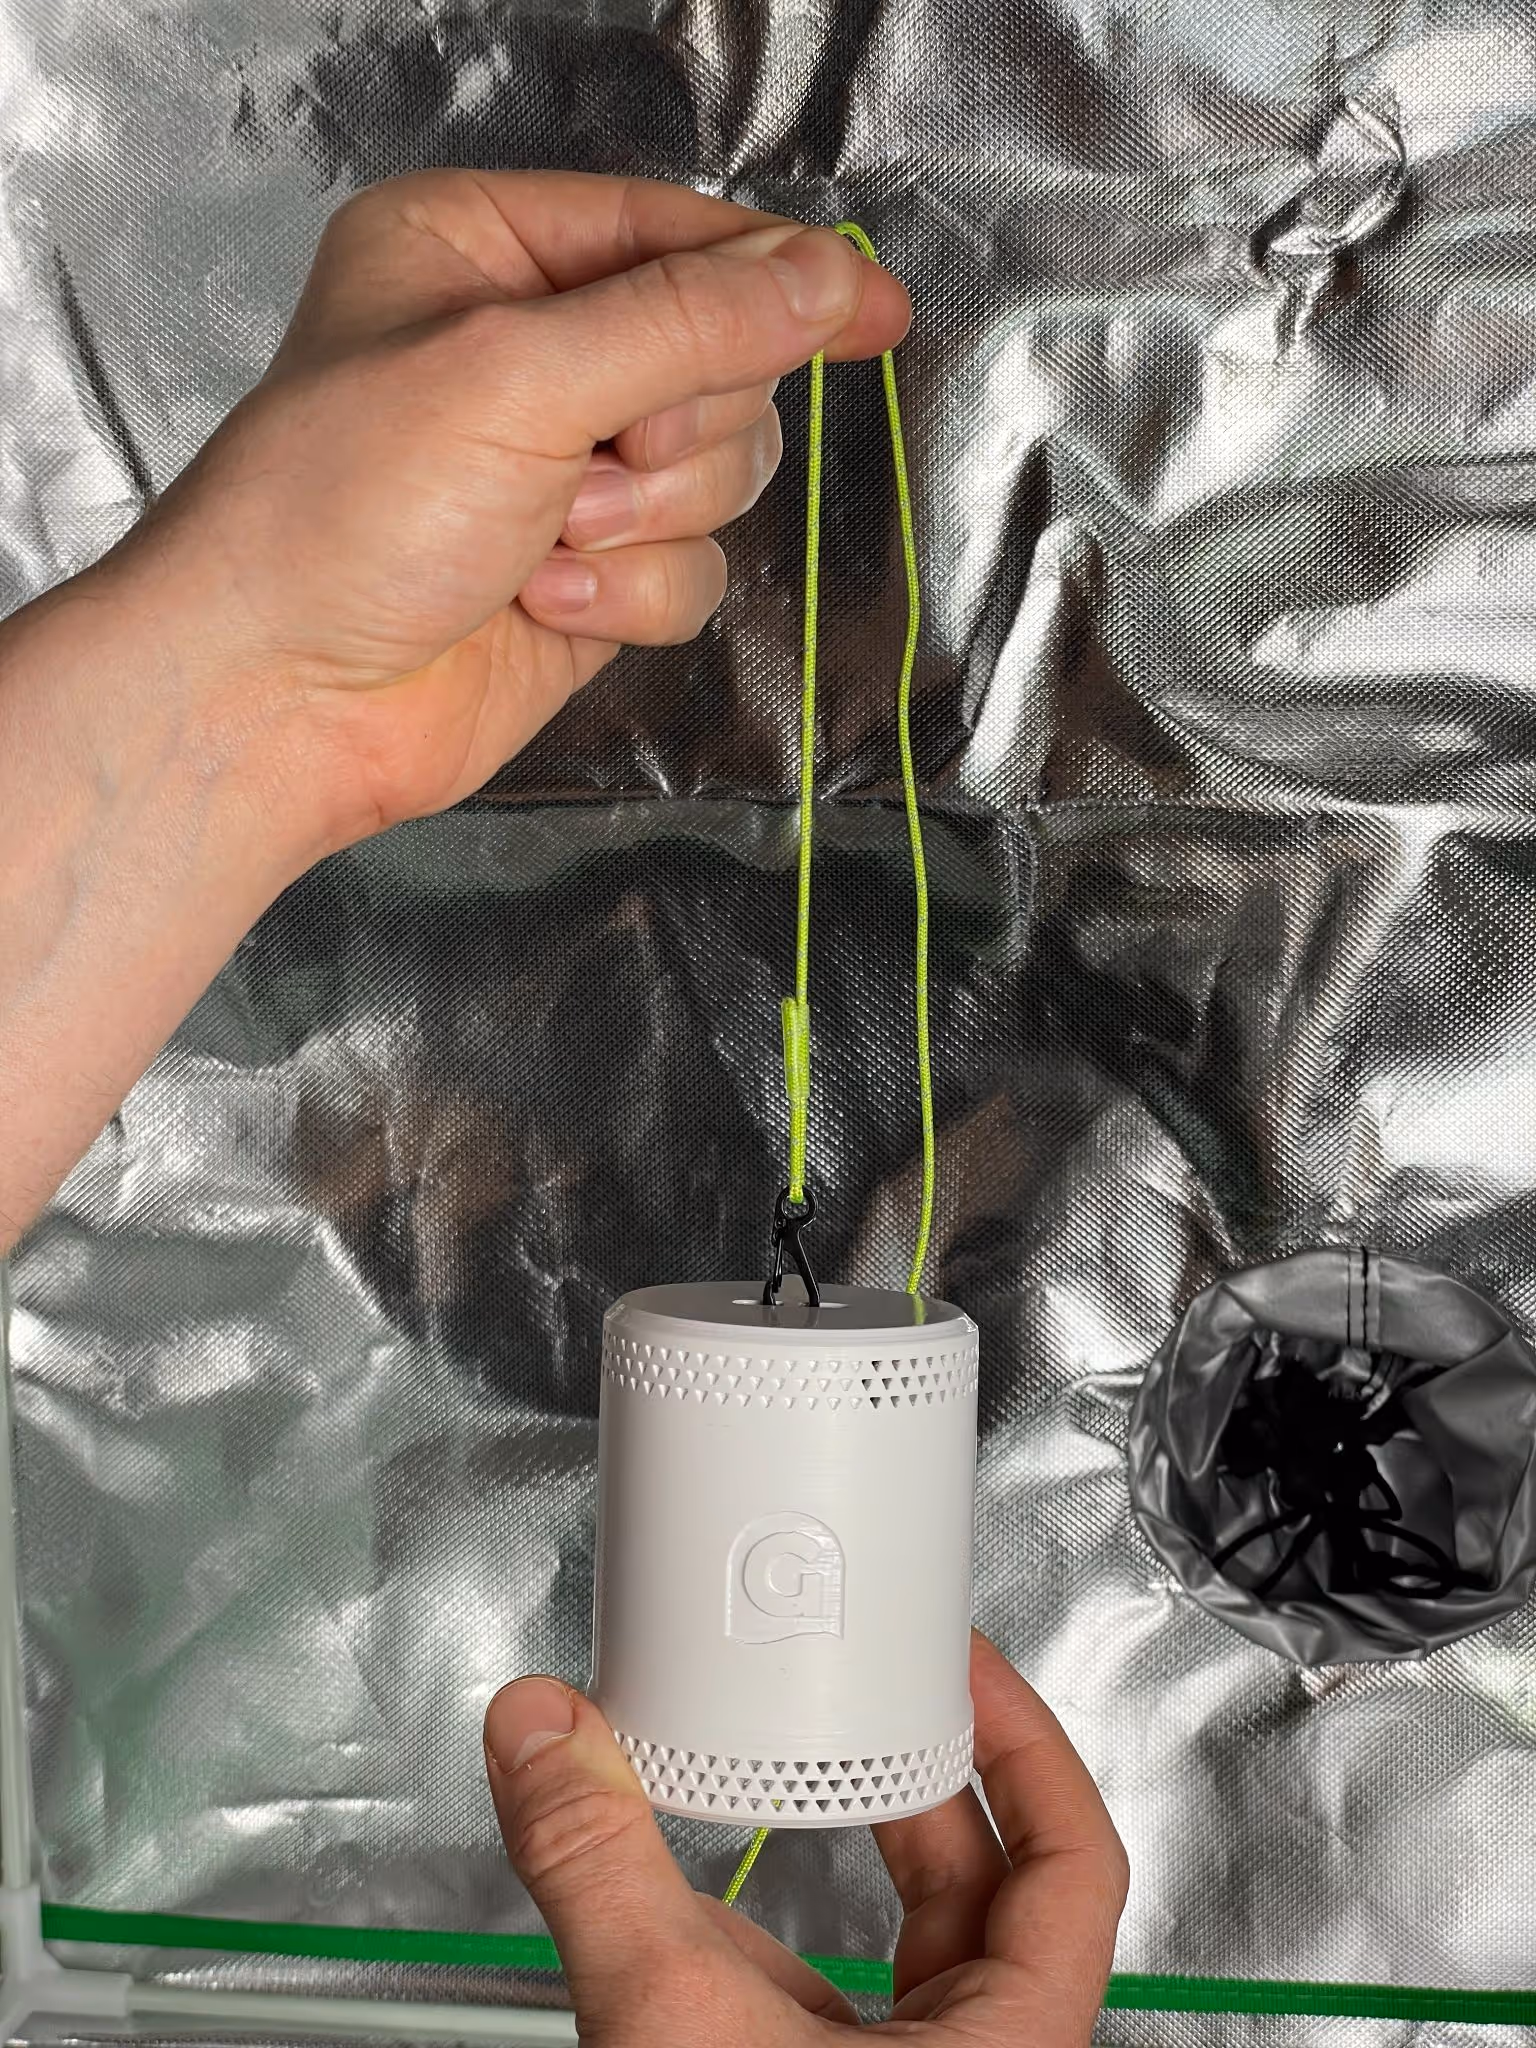
Position the carabiner clip against the hanging port on the top of the Grow Sensor. Press down on the carabiner to click it into place.
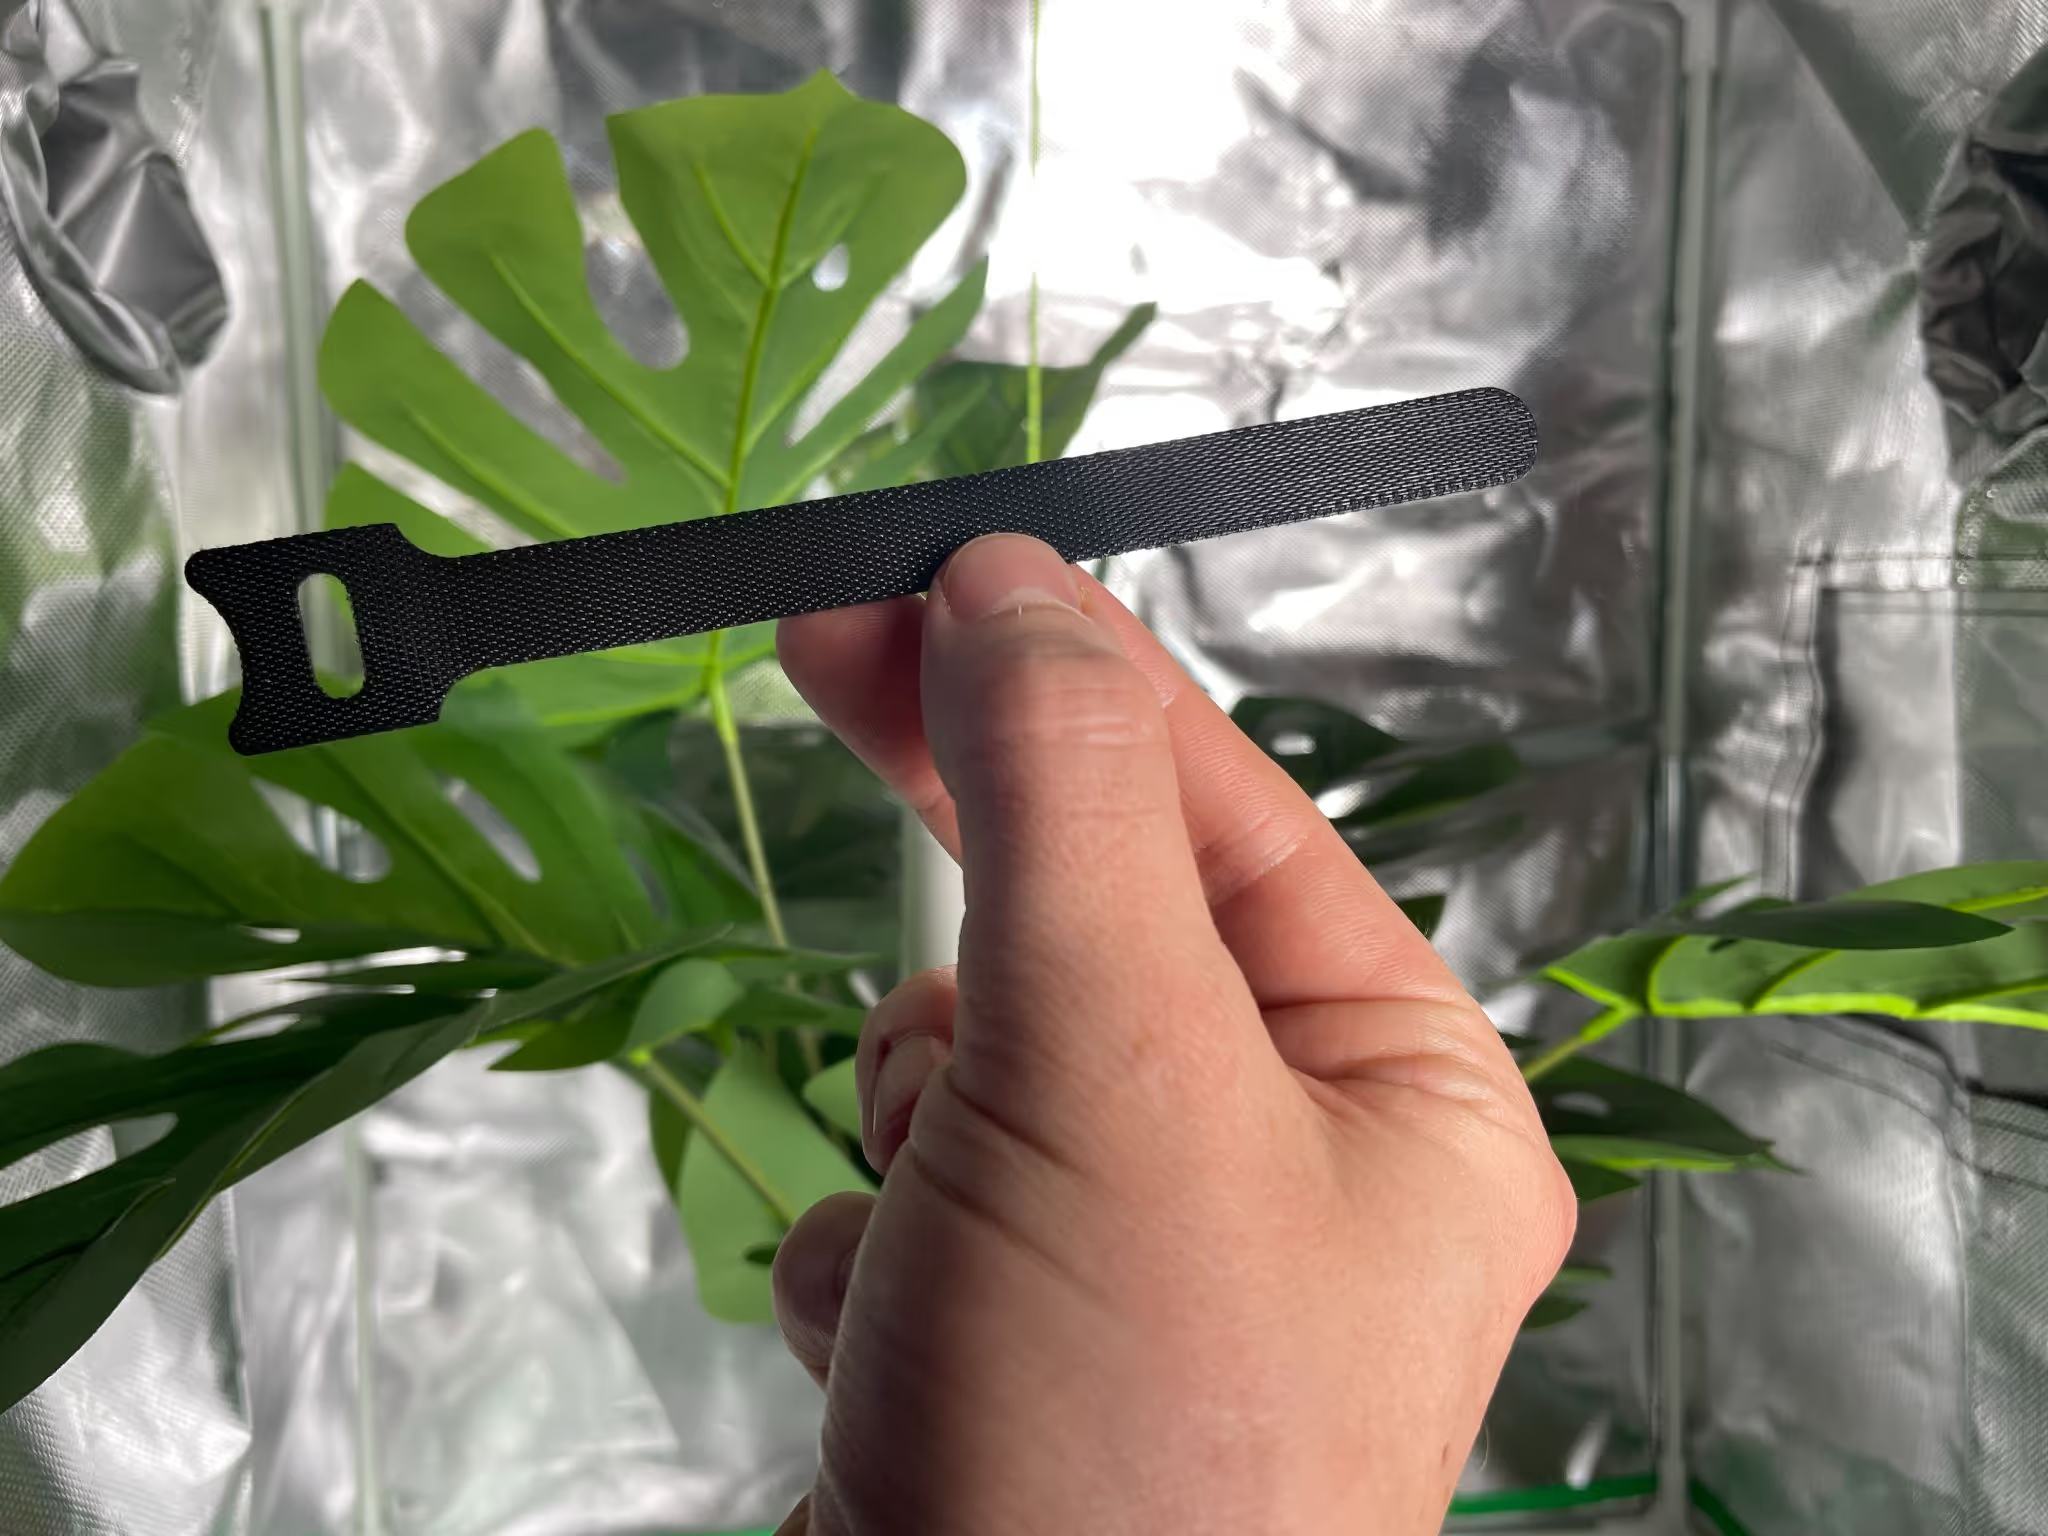

Wrap the quick-adjust velcro strap around the crossbar in your grow tent or an appropriate fixture within your grow room.
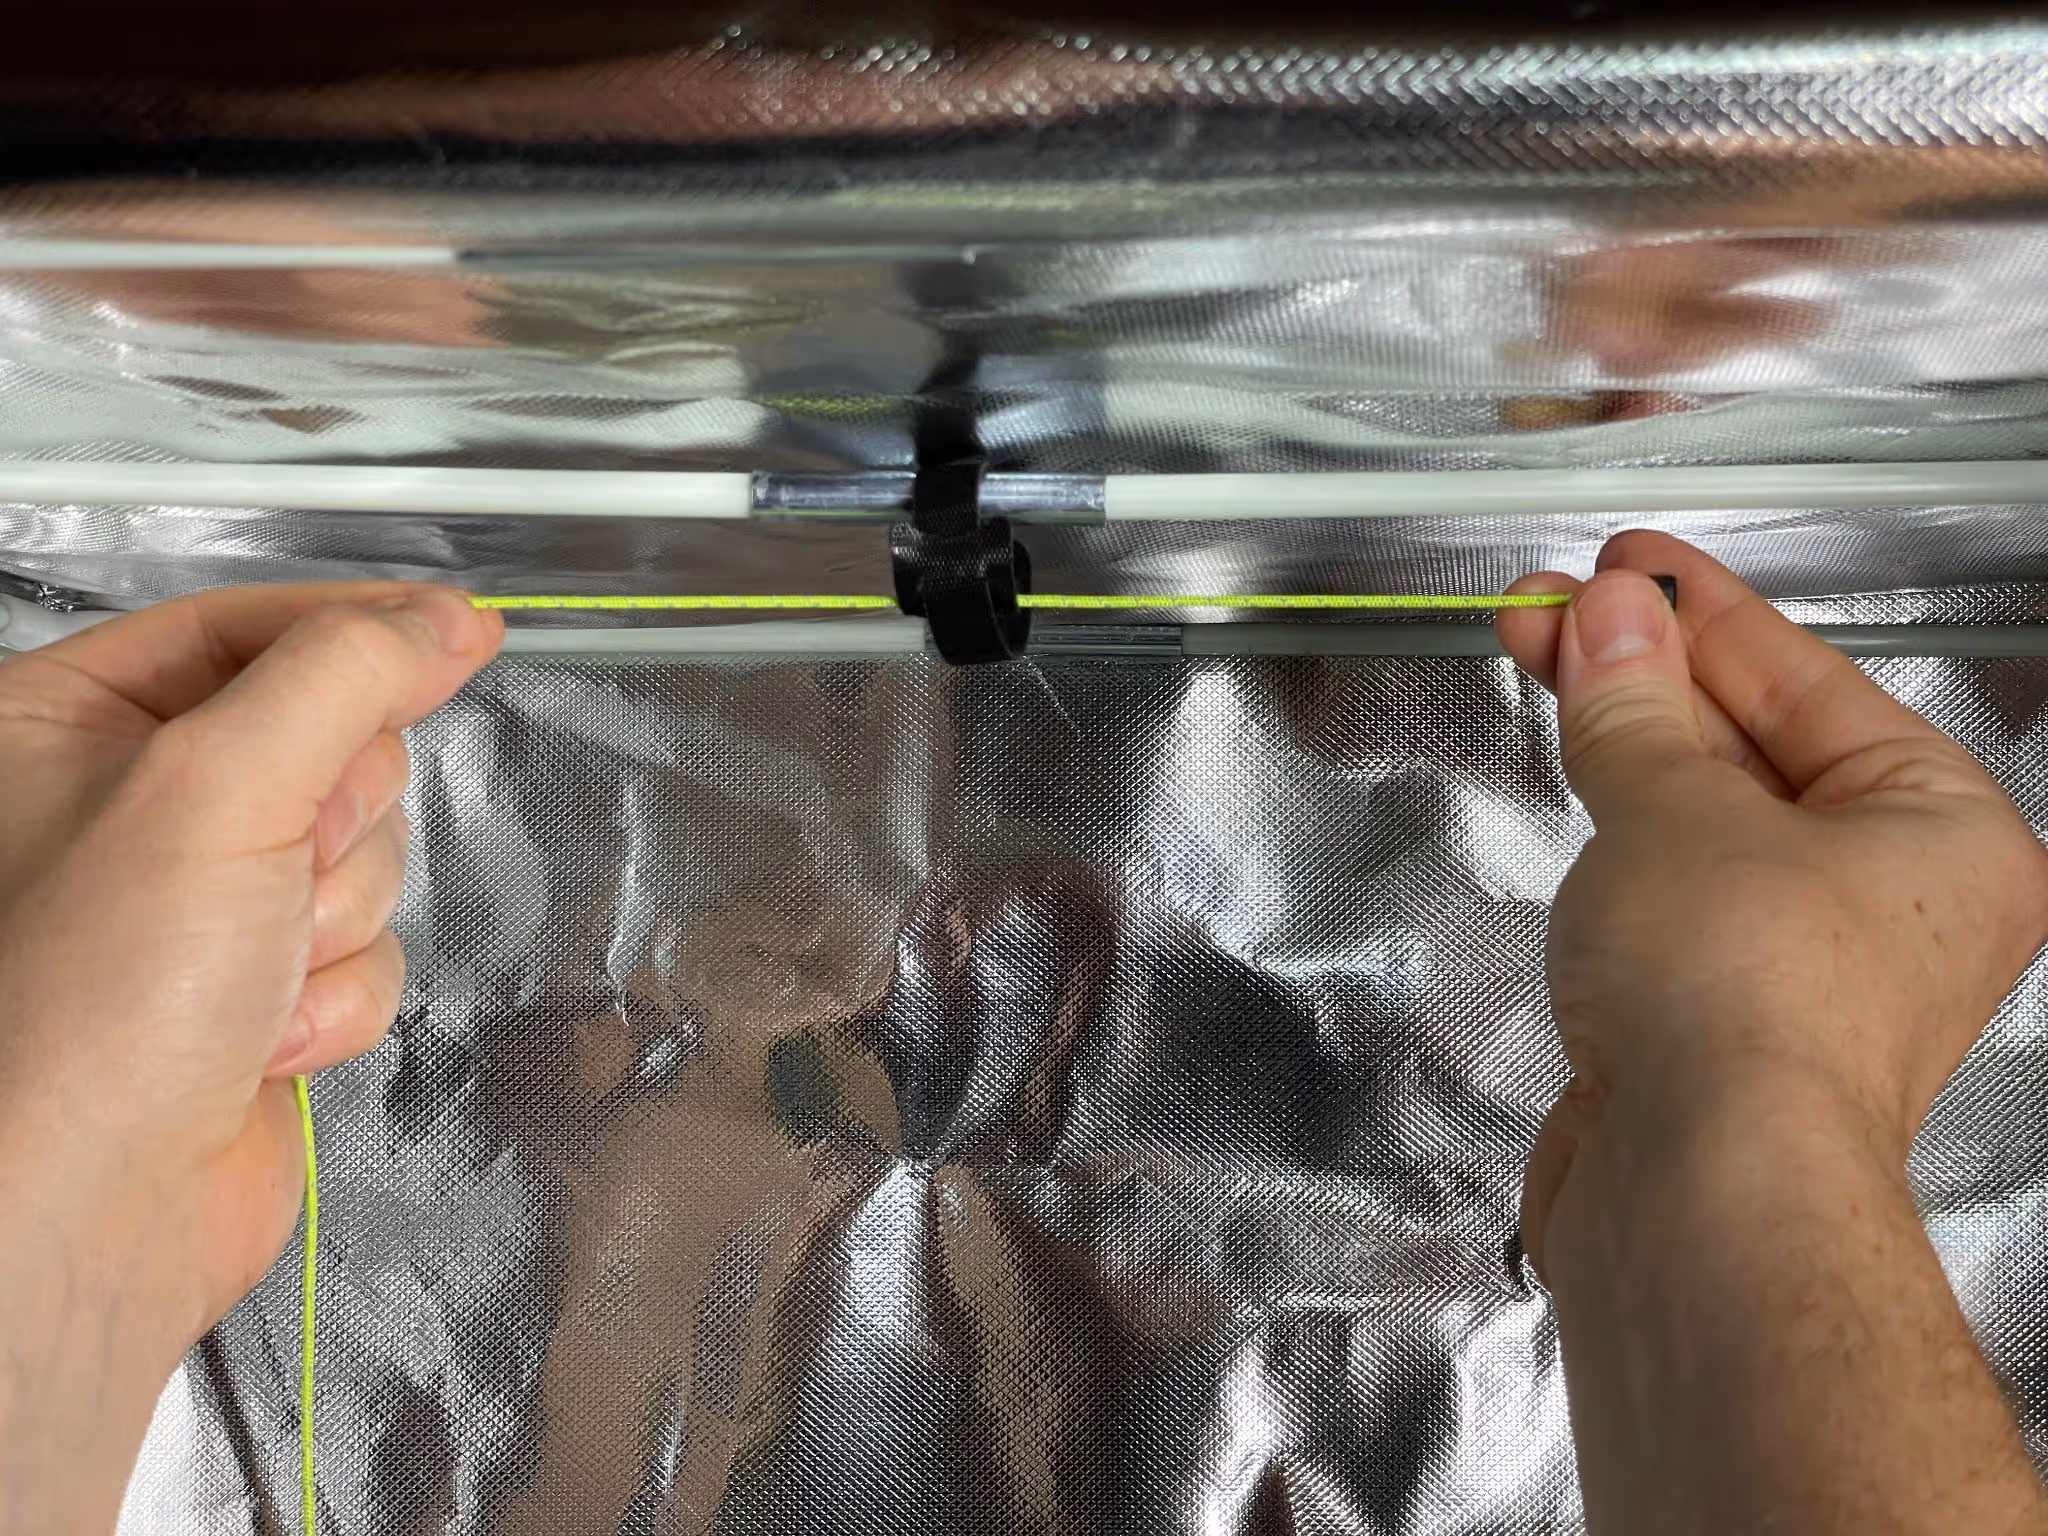
Thread the paracord through the velcro strap.
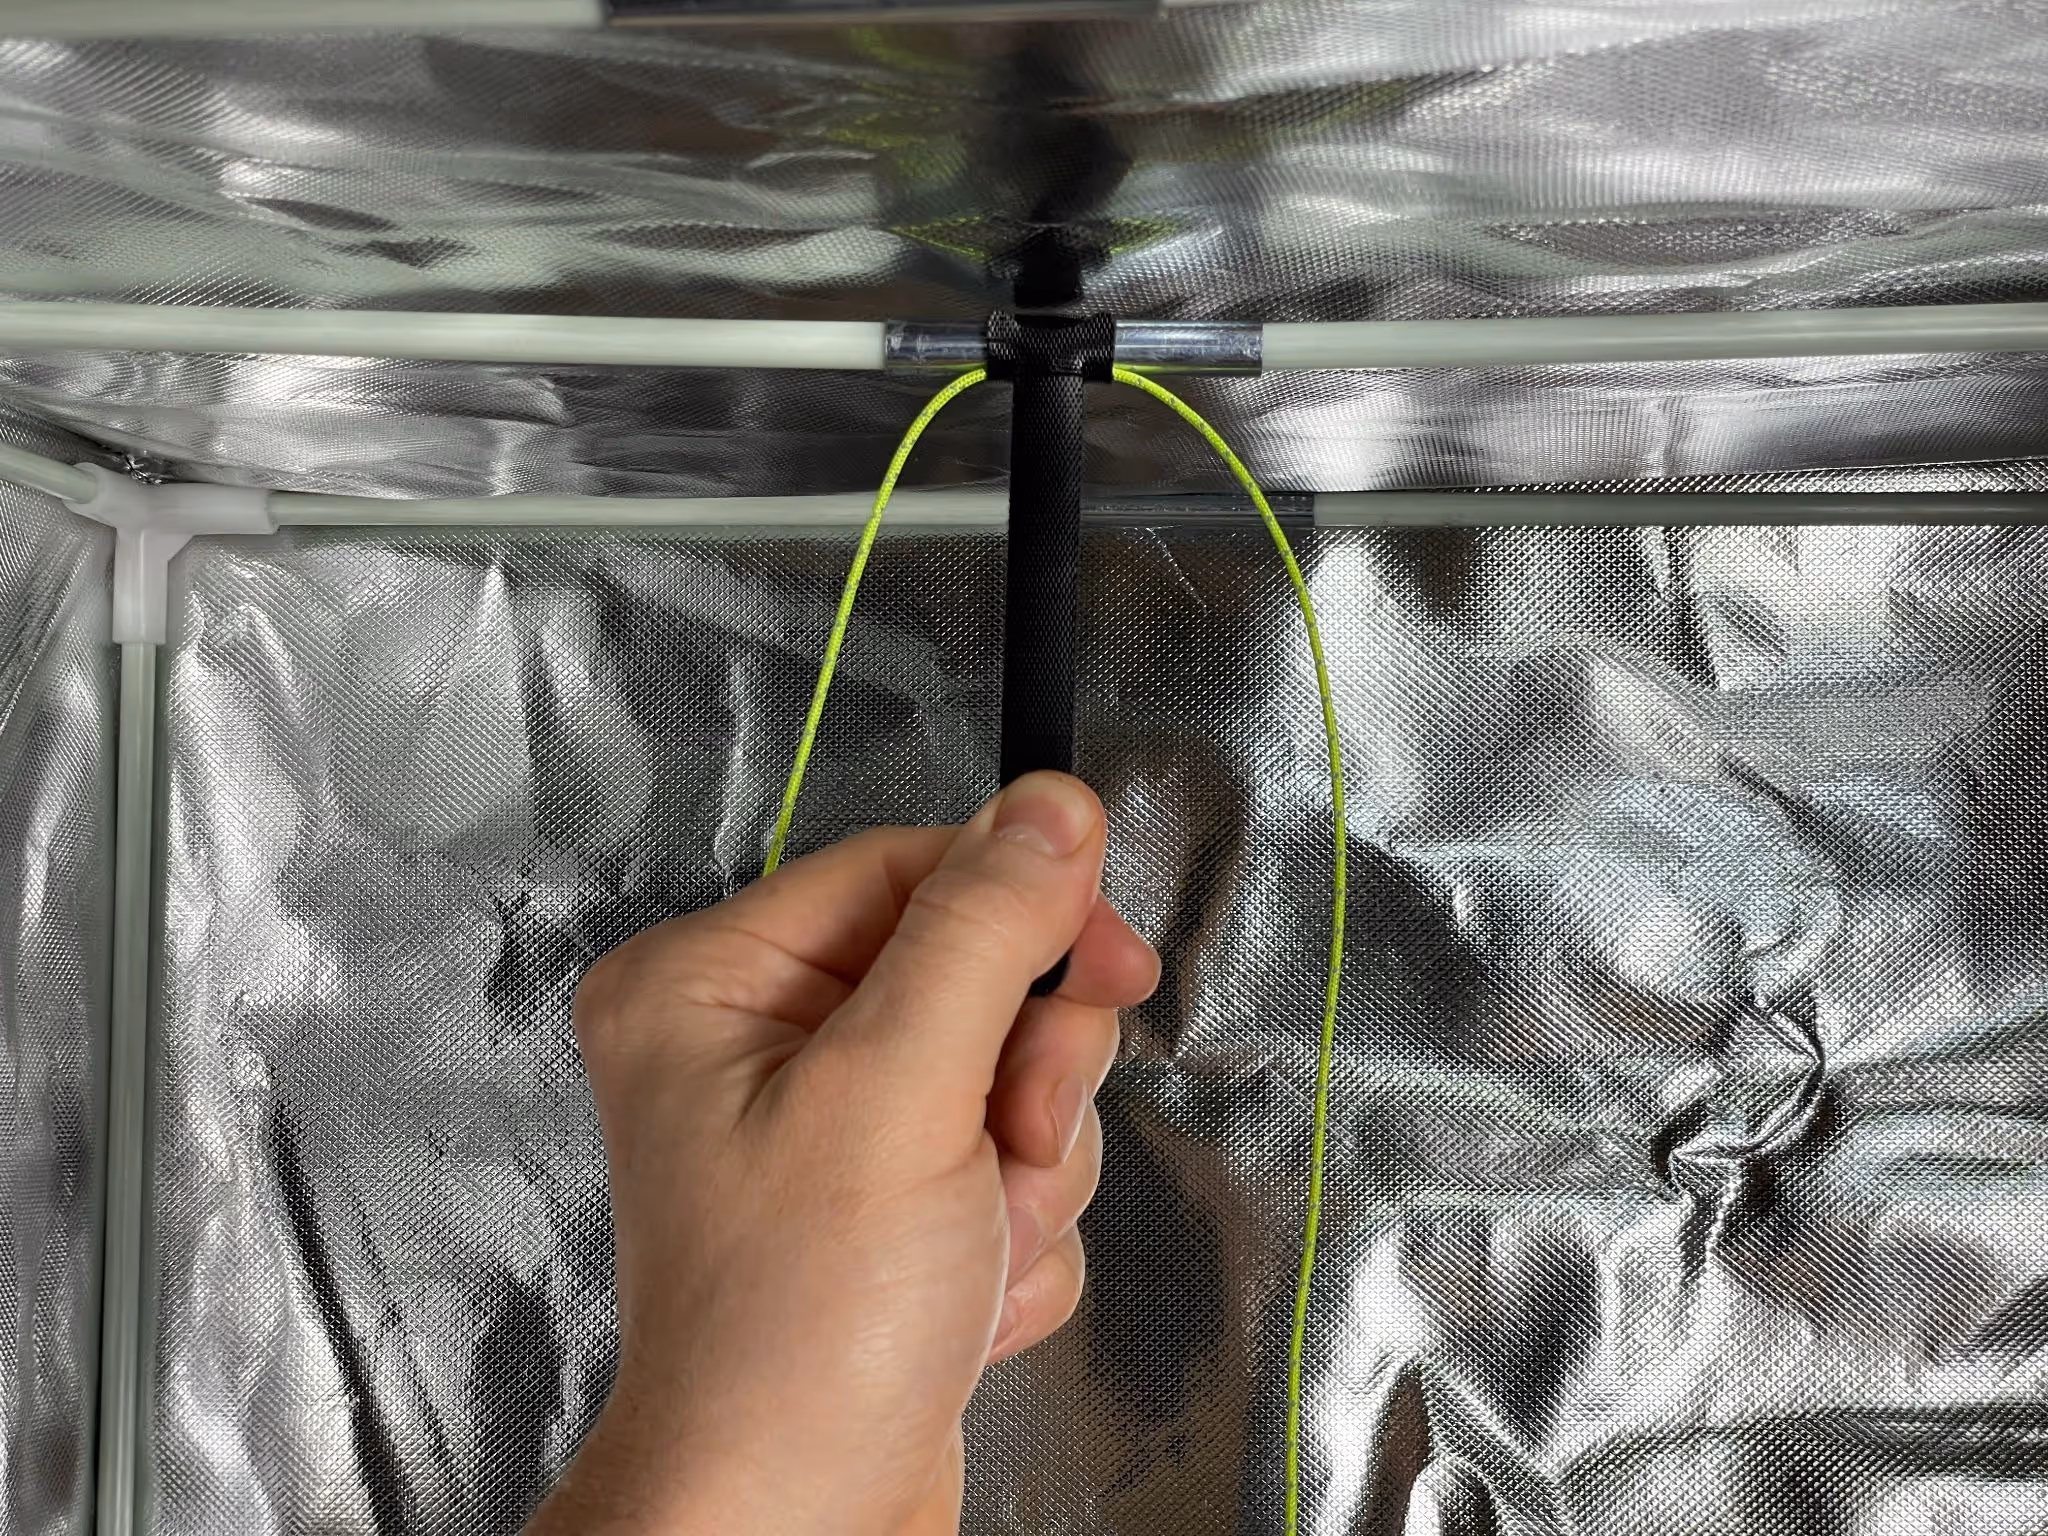
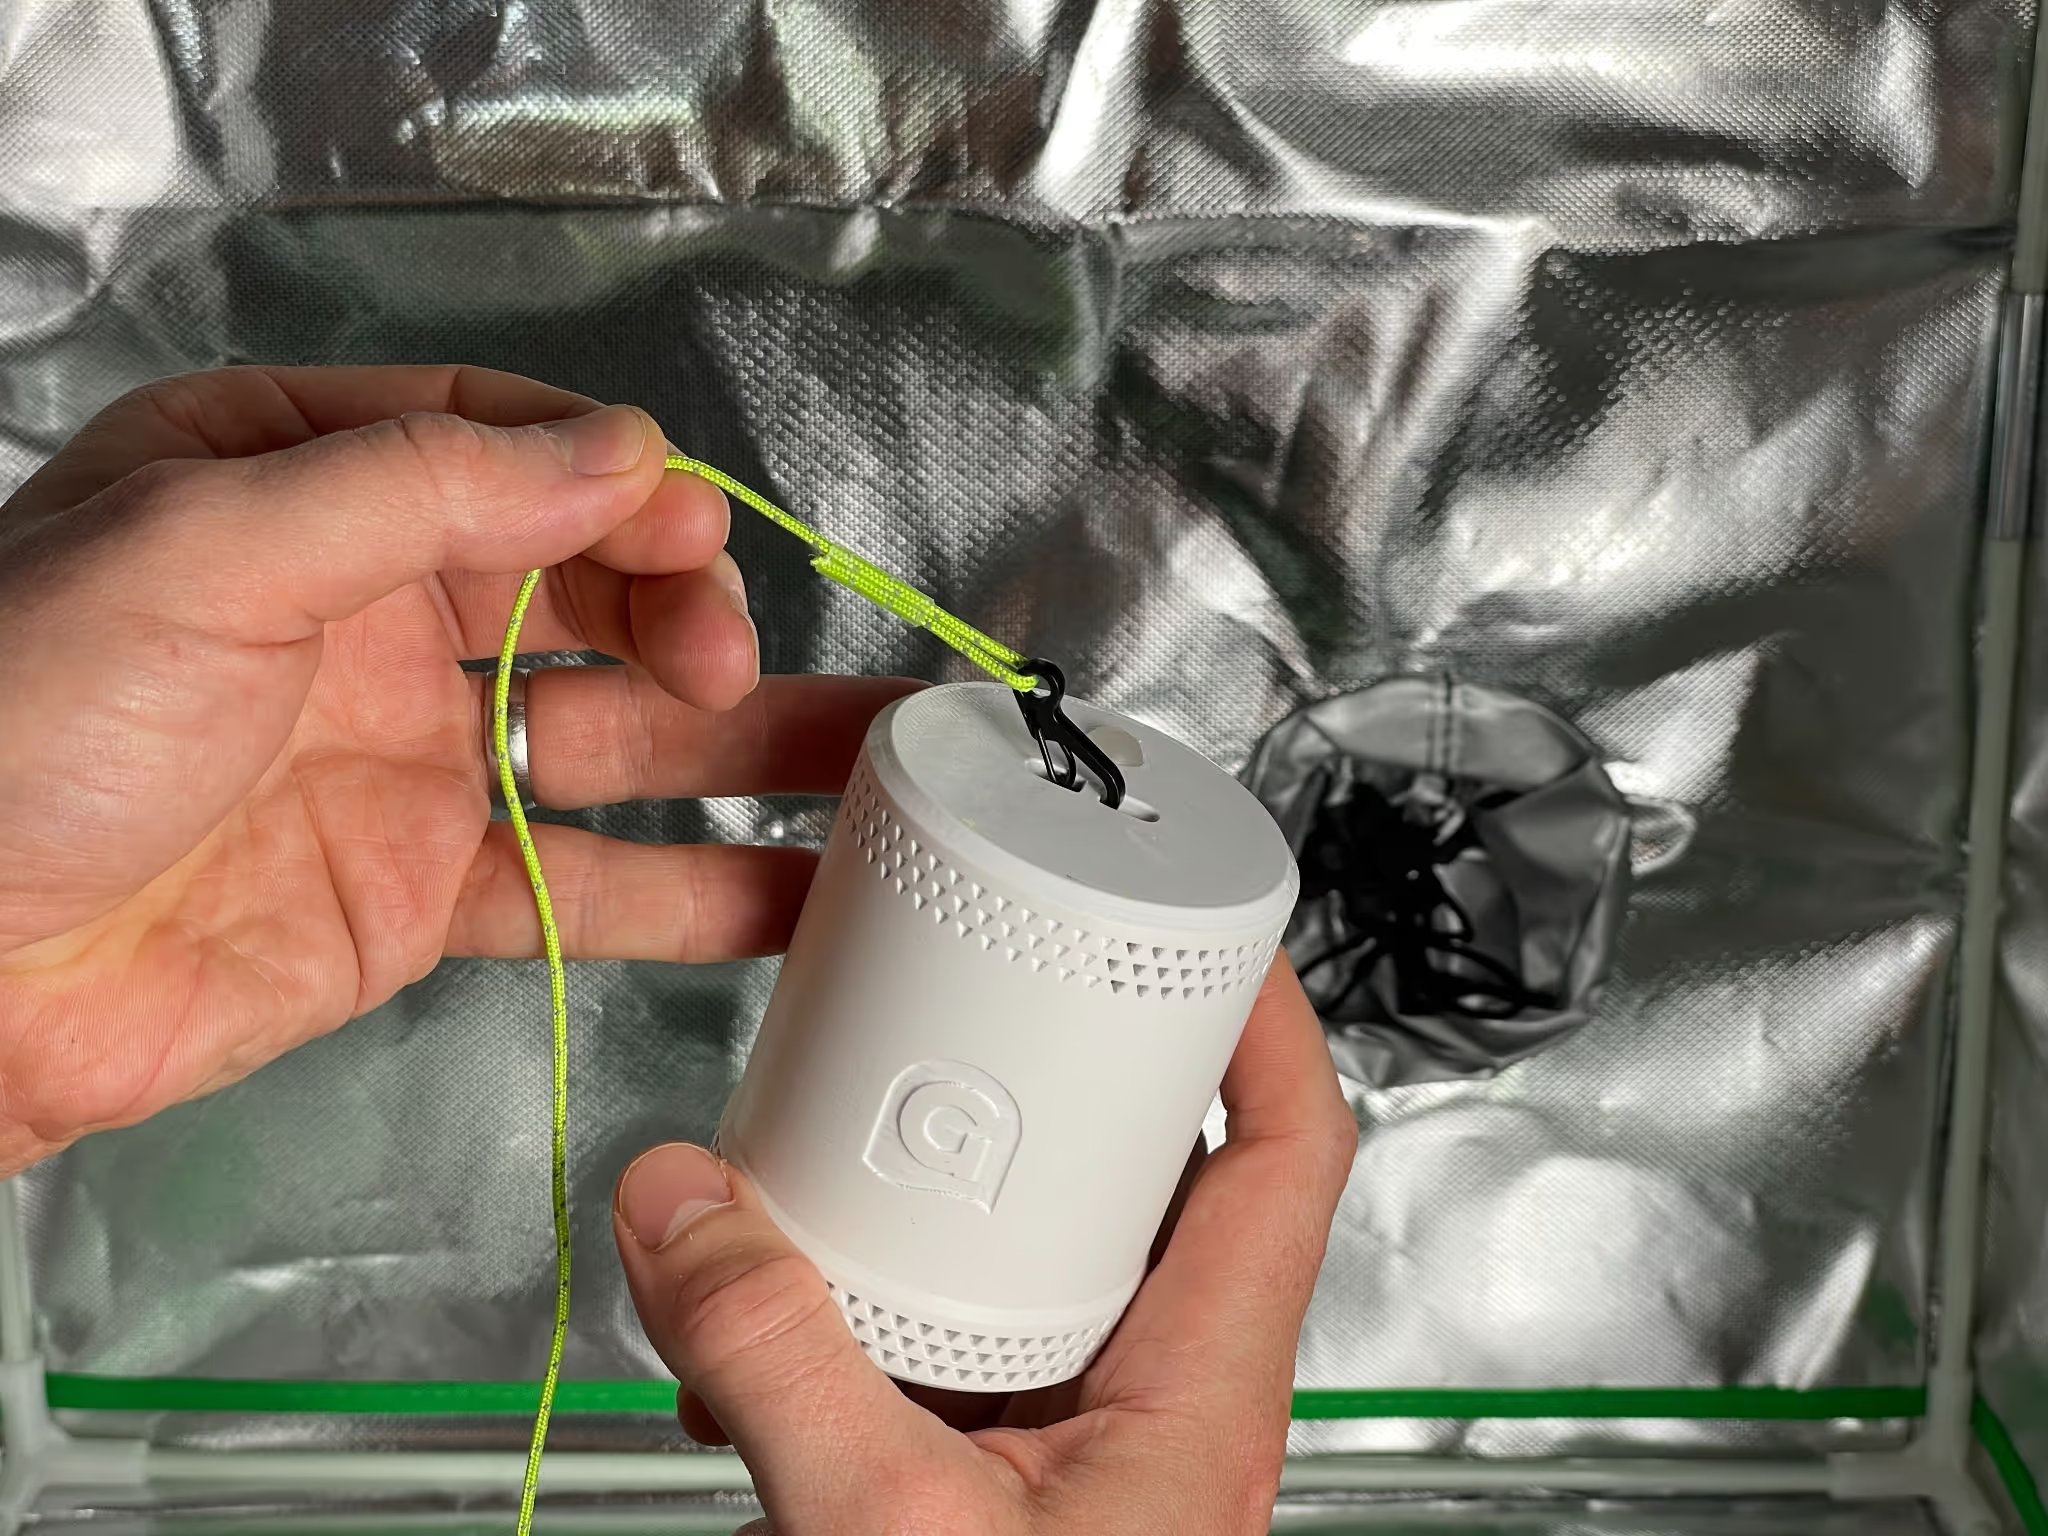
This is what keeps the Grow Sensor in place and allows for quick and simple raising and lowering of the sensor.
Ensure that the Grow Sensor now hangs securely from the crossbar.
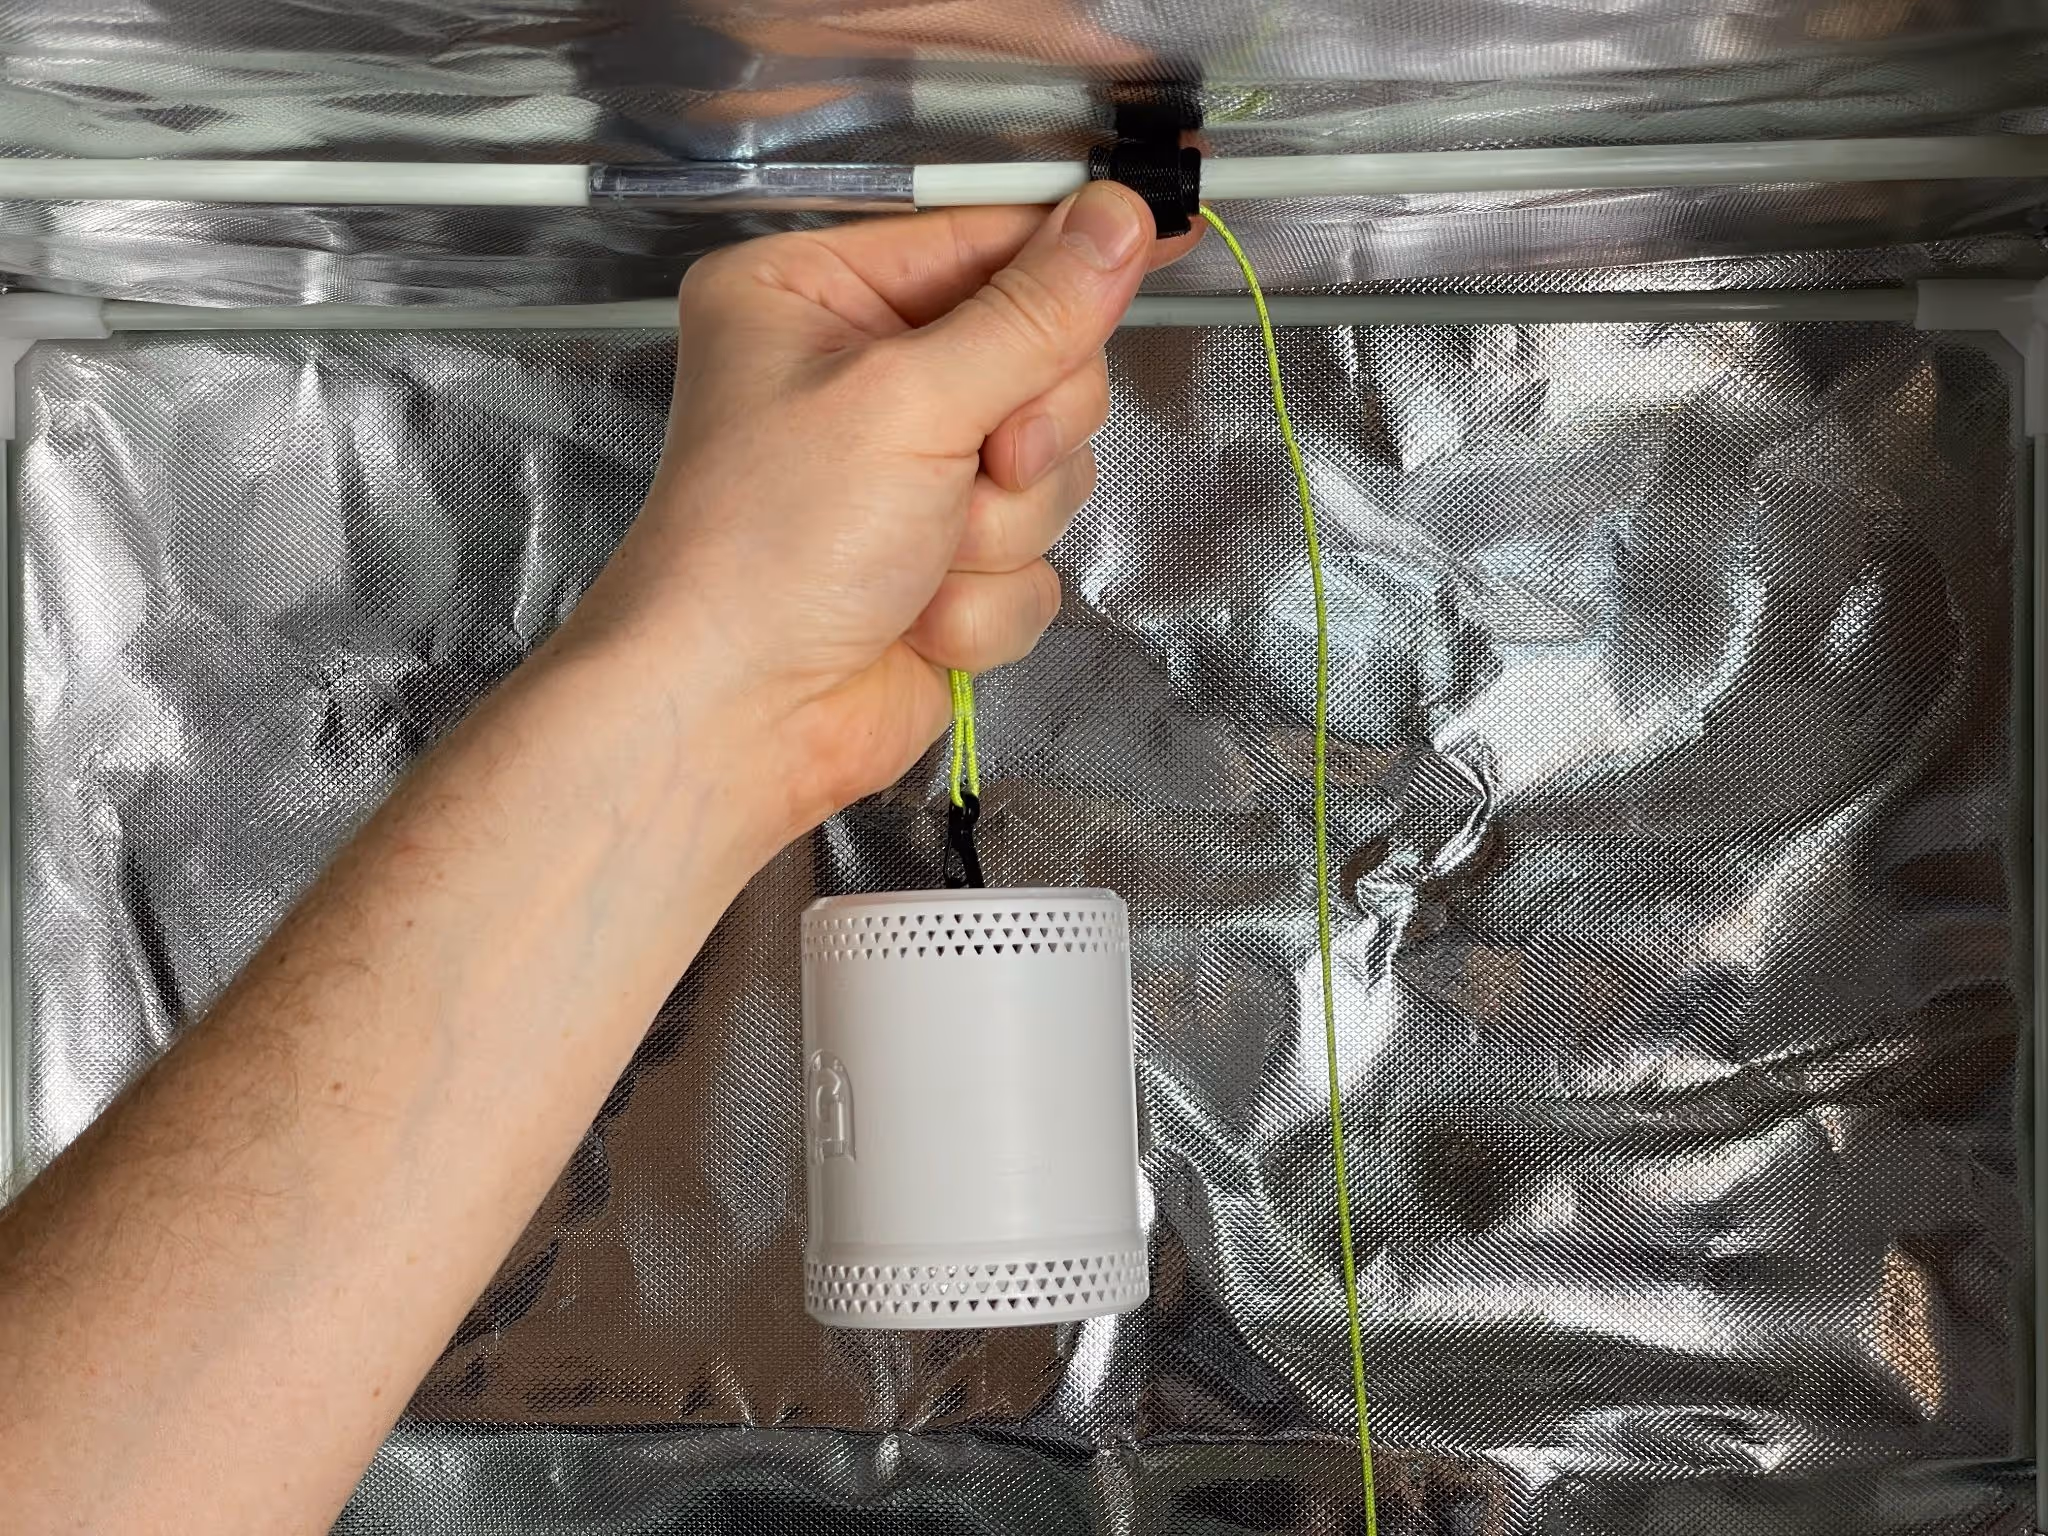
If necessary, slide the velcro strap fitting left or right along the crossbar to position the Grow Sensor above the canopy correctly.
Then, you can pull the paracord to raise the sensor, or gently pull on the sensor to lower it.
Position the sensor so the top of the device is perfectly aligned with the top of the canopy.
You're now ready for accurate monitoring.
Sensor placement is straightforward, but the rules are non-negotiable if you want optimal results.
We can't talk about the hanging system without discussing how to hang the sensor above a leaf for leaf VPD.
Leaf VPD is the metric you need to grow the healthiest plants
Is ambient or air temperature enough? No.
Relying solely on air temperature is insufficient and will lead to inaccurate VPD readings.
Your plants operate based on their leaf surface temperature, which is often several degrees cooler than the surrounding air (depending on the lights that you use).
To get a true leaf VPD measurement, the key metric for controlling transpiration, you must use an infrared thermometer or a leaf temperature sensor (infrared sensor) positioned to measure leaf temperature directly.
The Grow Sensor’s dedicated leaf surface temperature sensor is designed precisely for this purpose, giving you the necessary and accurate leaf VPD readings to cultivate a healthy plant.

For healthy growth and the highest yields from your plants, stop neglecting the position to ensure accurate VPD readings.
This setup is designed to work across various types of indoor gardens and grow spaces.
There may be unique situations with different lighting locations/orientations that require additional support. Just get in touch; we’re happy to help.
We offer a tripod mount option for extra flexibility, but please note that using the tripod mount may block the leaf surface temperature sensor, depending on the tripod you use.
There’s a quick fix for that, though - you just need to use a simple 3D-printed arm. We may release an arm in future if there’s enough demand.
We are committed to continually monitoring and improving the cultivation environment, and we’re currently conducting R&D on an automatic sensor raising system for commercial grow rooms.
This continuous research and innovation is what sets us apart from the industry.
Ready to stop guessing at your environmental conditions and start guaranteeing your yields?
You've read the science and seen the flaws.
Our system is the only one born from years of real-world frustration and engineered for maximum data accuracy.
Click here to buy the Grow Sensor PRO now and dial in perfect leaf VPD today.
Happy growing!
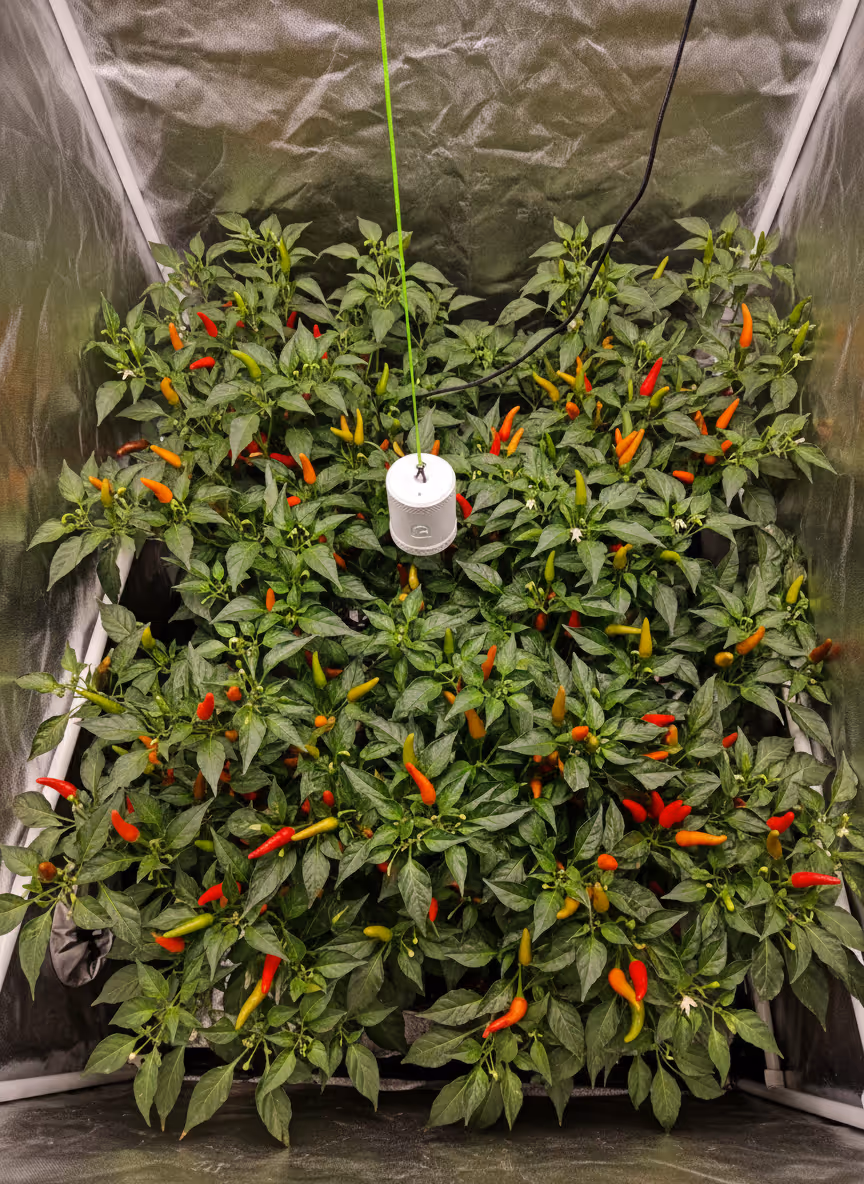
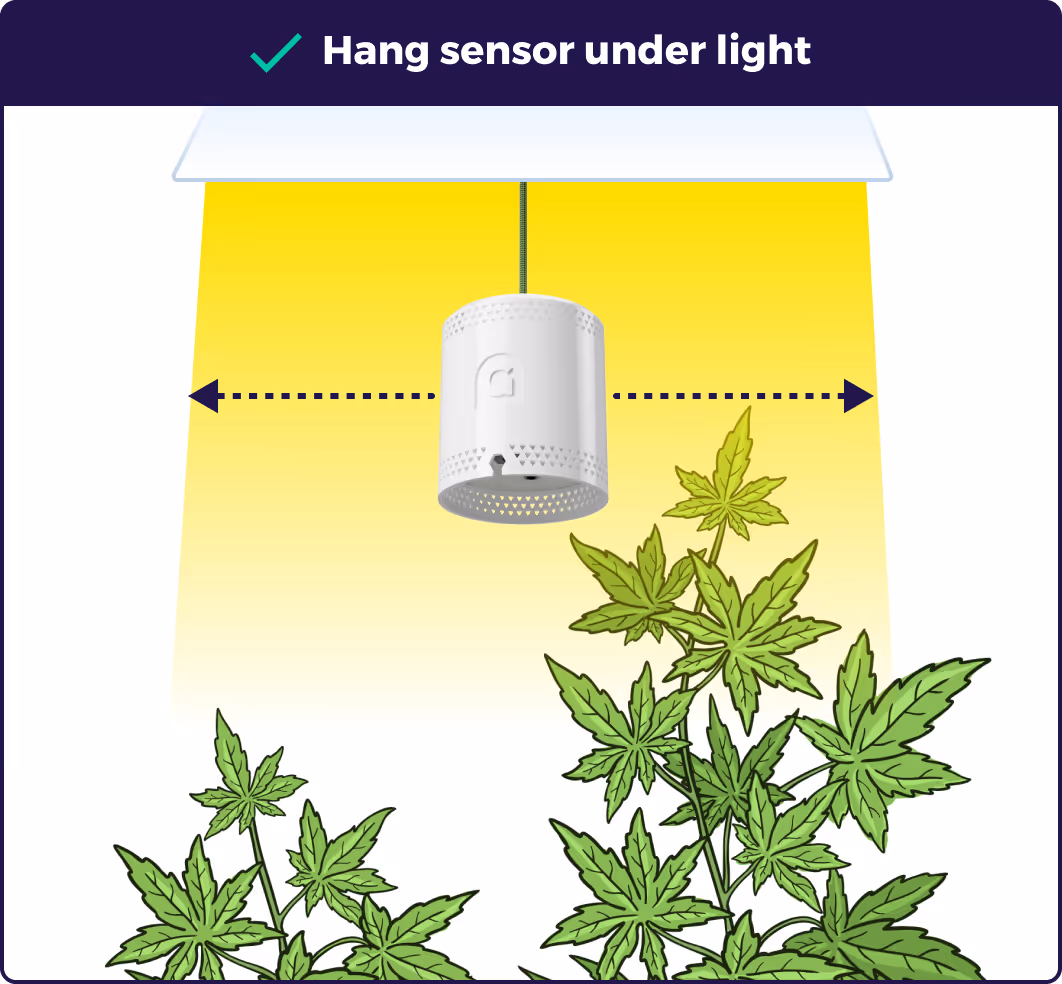
The sensor must be placed at the most representative and critical point in your grow space: the canopy level, in the centre of the direct light footprint.
This is the only way to measure the conditions that the plants are actually experiencing accurately.
Crucially, the bottom of the sensor should be positioned directly over a leaf to capture leaf temp for precise leaf VPD calculation.
Avoid placing the sensor against walls, on the floor, or directly in front of an airflow source.
The best height for a humidity sensor is at canopy level - aligned with the top leaves of your plants.
Humidity levels can be drastically different near the floor or the ceiling of your tent.
Placing the humidity sensor at the canopy level ensures you are getting accurate readings of the air immediately surrounding the most photosynthetically active part of the plant canopy.
This data is essential for calculating VPD and managing humidity levels during critical growth stages.
For the best results, your sensor should be placed in the most representative point of your grow room.
How to hang a Grow Sensor:
Sensor height: The top of the sensor must be aligned with the highest canopy level (the apex).
Depth: position it in the centre of your direct light footprint, away from walls or main air intake vents.
Leaf focus: Ensure the bottom of the sensor is directly over a representative leaf to capture accurate leaf temperature readings.
This disciplined position is crucial for monitoring your growing environment correctly.


.avif)